If you're a ghost hunter extraordinaire in *Phasmophobia*, you'll be thrilled to know that the game offers a plethora of achievements and trophies that challenge your paranormal prowess. Here's your ultimate guide to unlocking every achievement in *Phasmophobia*.
How To Unlock All Achievements in Phasmophobia
 Screenshot by The Escapist
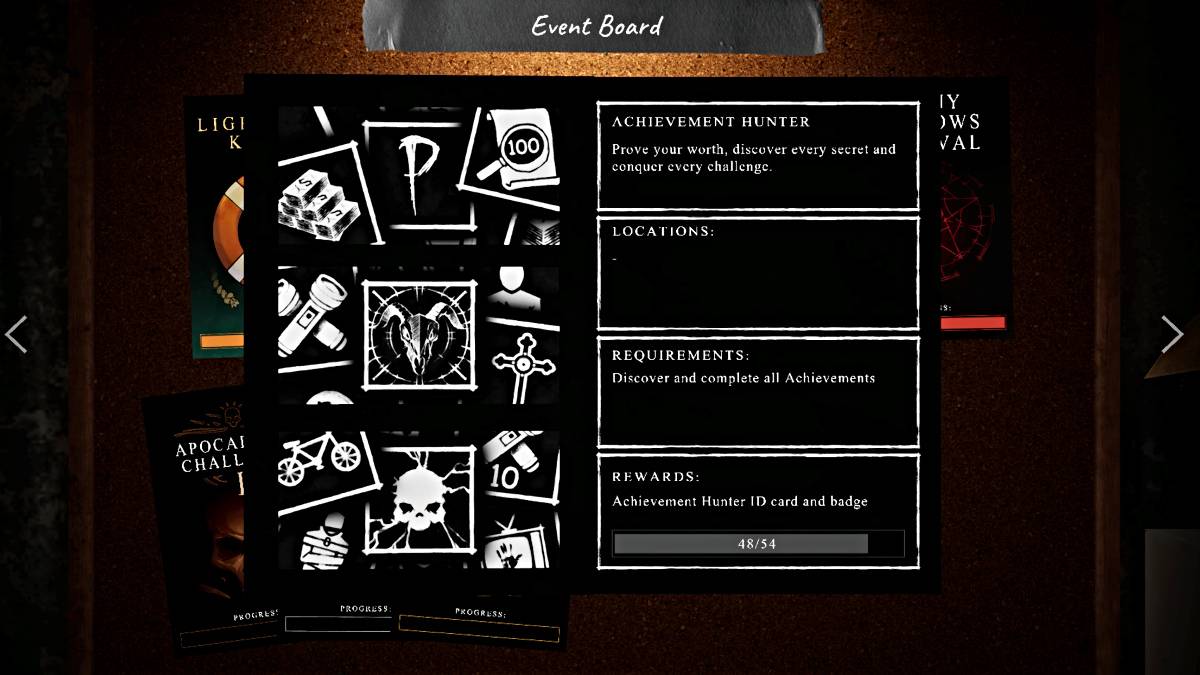
Phasmophobia boasts a total of 54 achievements, and for PS5 players, an additional Platinum trophy, all waiting to be unlocked through various in-game tasks. From completing training to mastering the toughest challenges, these achievements will not only test your skills but also earn you the prestigious Achievement Hunter ID Card and Badge for your character.
A key strategy for unlocking most achievements is teaming up with friends. Collaborating can speed up equipment setup, provide second opinions on ghost identities, and trigger specific ghost behaviors crucial for certain achievements.
Below is a comprehensive list of all current achievements in the game, along with the best tips to unlock each one.
| Achievement/Trophy | How to Unlock |
|---|---|
| No More Training Wheels | **Complete training** (Navigate to the "Training" tab in the Main Menu and follow each step until completion.) |
| Rookie | **Complete 10 Contracts** (Complete each contract by selecting a map, entering the location, guessing a ghost, and exiting via the van. Correct guesses are not required.) |
| Professional | **Complete 50 Contracts** (Follow the same process as for Rookie, but complete 50 times.) |
| Boss | **Complete 100 Contracts** (Follow the same process as for Rookie, but complete 100 times.) |
| Extra Mile | **Complete 50 optional objectives** (Complete up to three optional objectives per contract, marked by red checkmarks when done.) |
| Dedicated | **Complete 30 daily tasks** (Find daily tasks in the Main Menu, refreshing every 24 hours, and fulfill the required activities.) |
| Devoted | **Complete 10 weekly tasks** (Find weekly tasks in the Main Menu, refreshing every Sunday, and fulfill the required activities.) |
| Challenger Approaching | **Complete a Weekly Challenge Mode** (Complete the weekly challenge three times within the same week for the full $5,000 reward.) |
| Rise to the Challenge | **Complete the Weekly Challenge Mode 5 Times** (Complete the weekly challenge three times within the same week, five different weeks.) |
| Taking All Challenges | **Complete the Weekly Challenge Mode 10 Times** (Complete the weekly challenge three times within the same week, ten different weeks.) |
| Chump Change | **Spend $1** (Spend money earned from contracts on the Equipment Manager screen.) |
| Fat Stack | **Spend $10,000** (Spend money earned from contracts on the Equipment Manager screen.) |
| Cash Cow | **Spend $50,000** (Spend money earned from contracts on the Equipment Manager screen.) |
| Break The Bank | **Spend $100,000** (Spend money earned from contracts on the Equipment Manager screen.) |
| Bare Essentials | **Unlock all tier one equipment** (Reach Level 16 and purchase all optional tier one equipment.) |
| Tools of the Trade | **Unlock all tier two equipment** (Reach Level 49 and upgrade all starter and optional equipment to tier two.) |
| Fully Loaded | **Unlock all tier three equipment** (Reach Level 90 and upgrade all starter and optional equipment to tier three.) |
| Director | **Create a custom difficulty** (Go to the 'Difficulty' setting under 'Choose a Contract', select 'Custom', customize, and apply.) |
| Bronze Hunter | **Obtain the Bronze Apocalypse Trophy** (Complete the Apocalypse Challenge at Sunny Meadows Institution, including all objectives, photo, ghost identification, and survival. Use 'Insanity' difficulty if needed.) |
| Silver Hunter | **Obtain the Silver Apocalypse Trophy** (Complete the Apocalypse Challenge at Sunny Meadows Institution, including all objectives, photo, ghost identification, and survival.) |
| Gold Hunter | **Obtain the Gold Apocalypse Trophy** (Complete the Apocalypse Challenge at Sunny Meadows Institution, including all objectives, photo, ghost identification, and survival. Completing Gold first unlocks Bronze and Silver.) |
| Banshee Discovered | **Successfully identify your first Banshee and survive** (Use Ultraviolet, Ghost Orbs, and DOTs as evidence. Listen for screams and singing.) |
| Demon Discovered | **Successfully identify your first Demon and survive** (Use Ultraviolet, Ghost Writing, and Freezing Temperatures as evidence. Watch out for frequent hunts.) |
| Deogen Discovered | **Successfully identify your first Deogen and survive** (Use Spirit Box, Ghost Writing, and DOTs as evidence. Listen for heavy breathing.) |
| Goryo Discovered | **Successfully identify your first Goryo and survive** (Use EMF5, Ultraviolet, and DOTs as evidence. Note their limited movement during hunts.) |
| Hantu Discovered | **Successfully identify your first Hantu and survive** (Use Ultraviolet, Ghost Orbs, and Freezing Temperatures as evidence. They're faster in colder environments.) |
| Jinn Discovered | **Successfully identify your first Jinn and survive** (Use EMF5, Ultraviolet, and Freezing Temperatures as evidence. They're faster with the breaker on.) |
| Mare Discovered | **Successfully identify your first Mare and survive** (Use Spirit Box, Ghost Orbs, and Ghost Writing as evidence. They favor dark rooms.) |
| Moroi Discovered | **Successfully identify your first Moroi and survive** (Use Spirit Box, Ghost Writing, and Freezing Temperatures as evidence. Beware of their sanity-draining curse.) |
| Myling Discovered | **Successfully identify your first Myling and survive** (Use EMF5, Ultraviolet, and Ghost Writing as evidence. They're quieter from a distance.) |
| Obake Discovered | **Successfully identify your first Obake and survive** (Use EMF5, Ultraviolet, and Ghost Orbs as evidence. Watch for abnormal prints and model changes.) |
| Oni Discovered | **Successfully identify your first Oni and survive** (Use EMF5, Freezing Temperatures, and DOTs as evidence. They drain more sanity during events.) |
| Onryo Discovered | **Successfully identify your first Onryo and survive** (Use Spirit Box, Ghost Orbs, and Freezing Temperatures as evidence. Test with Firelights to trigger a hunt.) |
| Phantom Discovered | **Successfully identify your first Phantom and survive** (Use Spirit Box, Ultraviolet, and DOTs as evidence. They're invisible in photos.) |
| Poltergeist Discovered | **Successfully identify your first Poltergeist and survive** (Use Spirit Box, Ultraviolet, and Ghost Writing as evidence. They throw objects further.) |
| Raiju Discovered | **Successfully identify your first Raiju and survive** (Use EMF5, Ghost Orbs, and DOTs as evidence. They hunt at higher sanity and move faster near electronics.) |
| Revenant Discovered | **Successfully identify your first Revenant and survive** (Use Ghost Orbs, Ghost Writing, and Freezing Temperatures as evidence. They move slowly until they detect you.) |
| Shade Discovered | **Successfully identify your first Shade and survive** (Use EMF5, Ghost Writing, and Freezing Temperatures as evidence. They're less active if you're nearby.) |
| Spirit Discovered | **Successfully identify your first Spirit and survive** (Use EMF5, Spirit Box, and Ghost Writing as evidence. They have a longer cooldown with Incense.) |
| Thaye Discovered | **Successfully identify your first Thaye and survive** (Use Ghost Orbs, Ghost Writing, and DOTs as evidence. Their model ages as sanity drops.) |
| The Mimic Discovered | **Successfully identify your first Mimic and survive** (Use Spirit Box, Ultraviolent, Freezing Temperatures, and Ghost Orbs as evidence. They mimic other ghost behaviors.) |
| The Twins Discovered | **Successfully identify your first Twins and survive** (Use EMF5, Spirit Box, and Freezing Temperatures as evidence. They can show double activity and hunt at different speeds.) |
| Wraith Discovered | **Successfully identify your first Wraith and survive** (Use EMF5, Spirit Box, and DOTs as evidence. They don't interact with salt.) |
| Yokai Discovered | **Successfully identify your first Yokai and survive** (Use Spirit Box, Ghost Orbs, and DOTs as evidence. They have strong audio detection and hunt at high sanity.) |
| Yurei Discovered | **Successfully identify your first Yurei and survive** (Use Ghost Orbs, Freezing Temperatures, and DOTs as evidence. They frequently interact with doors.) |
| I | **Reach Prestige I** (Reach Level 100 and choose to Prestige. Note that this resets your level and equipment.) |
| II | **Reach Prestige II** (Reach Level 100 and choose to Prestige again. Note that this resets your level and equipment.) |
| III | **Reach Prestige III** (Reach Level 100 and choose to Prestige a third time. Note that this resets your level and equipment.) |
| Work Experience (Hidden) | **Complete your first contract** (Complete a contract in either Singleplayer or Multiplayer by guessing a ghost and exiting via the van.) |
| Flawless Execution (Hidden) | **Complete a perfect investigation** (Complete all three optional objectives, take nine 3-star photos, collect the bone, and guess the ghost correctly.) |
| They’re Here (Hidden) | **Witness a Poltergeist ability** (Witness a Poltergeist throwing multiple objects by grouping items in the ghost's location.) |
| Escape Artist (Hidden) | **Escape a Revenant** (Successfully escape a Revenant during a hunt using tier 2 or 3 Incense to stall them.) |
| The Bait (Hidden) | **Get killed by a Banshee in multiplayer** (Identify a Banshee, lower your sanity, and wait in the ghost's location for a hunt.) |
| Doom Slayed (Hidden) | **Get killed by a Demon ability within the first minute** (Enter a map with a Demon and get hunted immediately due to their ability to hunt at any sanity level.) |
| Paranormal Perfectionist (PS5 Platinum Trophy) | Obtain all trophies |
That concludes our guide on how to unlock all achievements in *Phasmophobia*. For the latest guides and news on the game, including the *Phasmophobia* No Evidence Cheat Sheet, be sure to check out The Escapist.
*Phasmophobia is available now on PlayStation, Xbox, and PC.*


