Mastering the Barbarian in Baldur's Gate 3: Top Feats for Maximum Rage
Barbarians in Baldur's Gate 3 (BG3) are potent damage dealers, but strategic feat selection significantly enhances their effectiveness. While Barbarians have fewer feat choices than some classes, the right ones can make a huge difference. This guide highlights the top 10 feats to consider for your Barbarian build.
Top 10 Barbarian Feats in Baldur's Gate 3
Barbarians are straightforward but powerful. Their raw strength and damage output are amplified by specific feats. Let's explore the best options:
10. Durable
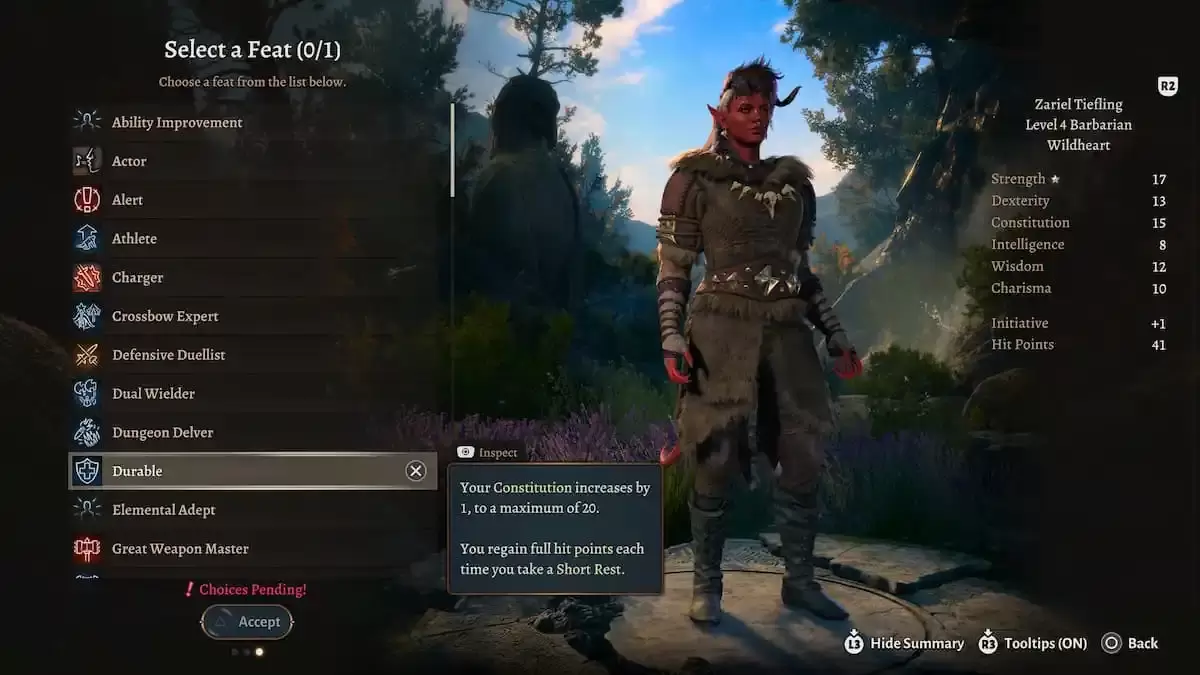
| How to Unlock | Description |
|---|---|
| Available at Level 4 | Constitution increases by 1 (max 20). Full HP restoration on Short Rest. |
Durable enhances survivability. The extra Constitution point and full HP recovery on short rests are invaluable, especially on higher difficulty settings.
9. Lucky
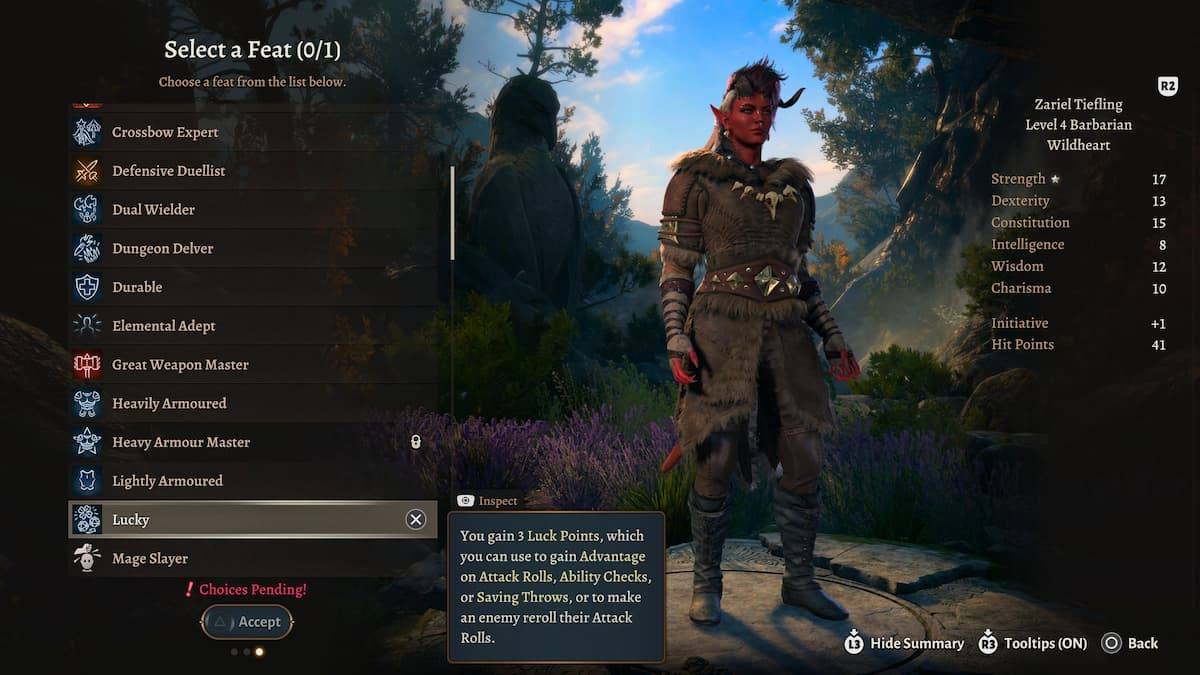
| How to Unlock | Description |
|---|---|
| Available at Level 4 | 3 Luck points per long rest. Use to gain advantage on rolls or force enemy rerolls. |
Lucky's versatility shines. Three luck points per long rest provide strategic advantages on attacks, ability checks, saving throws, or to counter enemy attacks. A strong, adaptable feat for any Barbarian build.
8. Mage Slayer
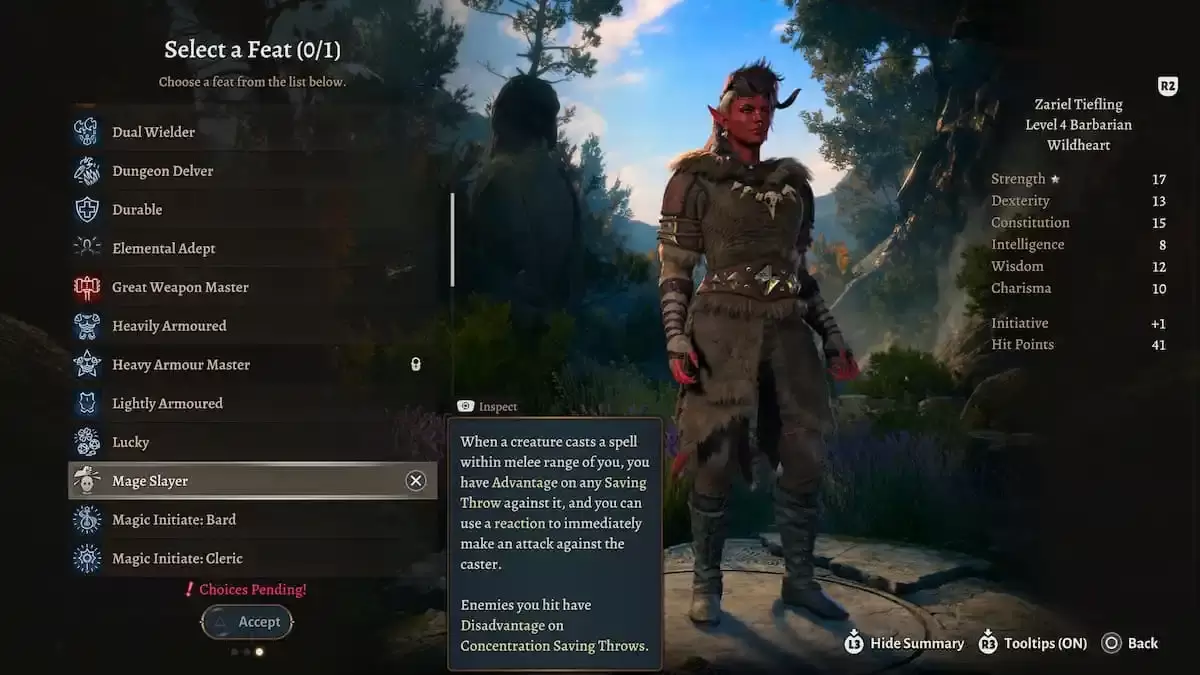
| How to Unlock | Description |
|---|---|
| Available at Level 4 | Advantage on saving throws against spells cast in melee range. Reactionary attack against spellcasters. Disadvantage on concentration saves for hit enemies. |
Mage Slayer directly counters a Barbarian's common nemesis: spellcasters. Advantage against spells, a reactive attack, and imposed disadvantage on concentration checks make this a valuable asset.
7. Athlete
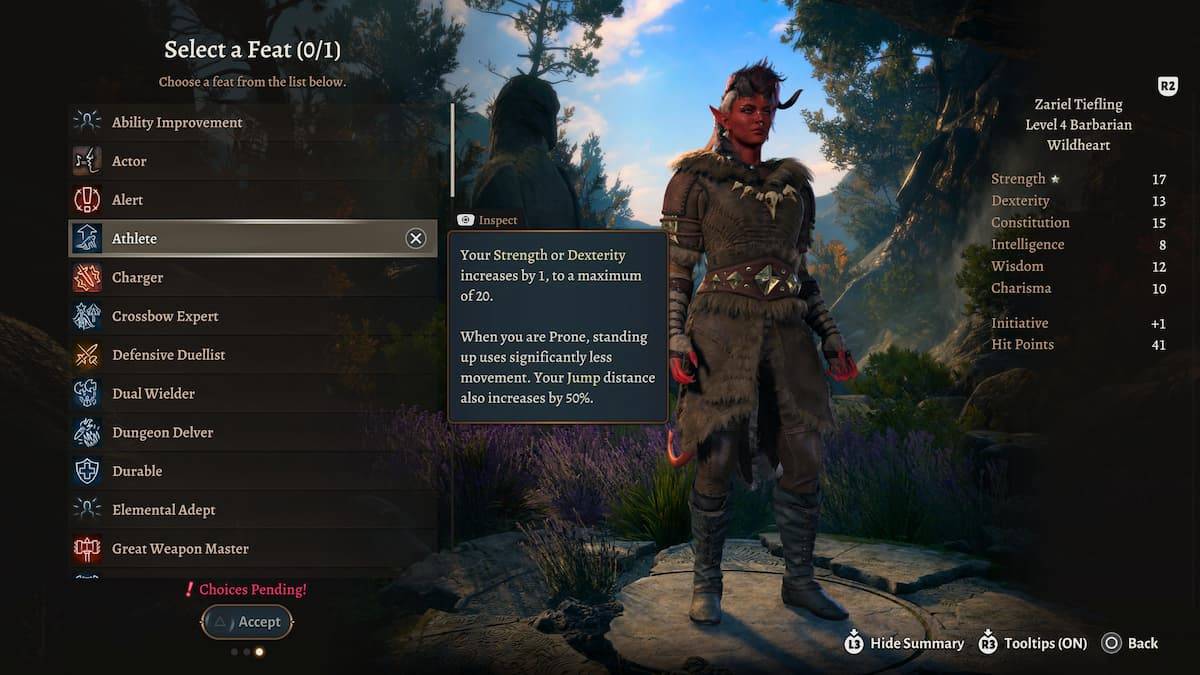
| How to Unlock | Description |
|---|---|
| Available at Level 4 | Strength or Dexterity +1 (max 20). Reduced movement cost for standing up from prone. 50% increased jump distance. |
Athlete enhances mobility and exploration. The stat boost and improved movement make traversal and combat maneuvers easier.
6. Savage Attacker
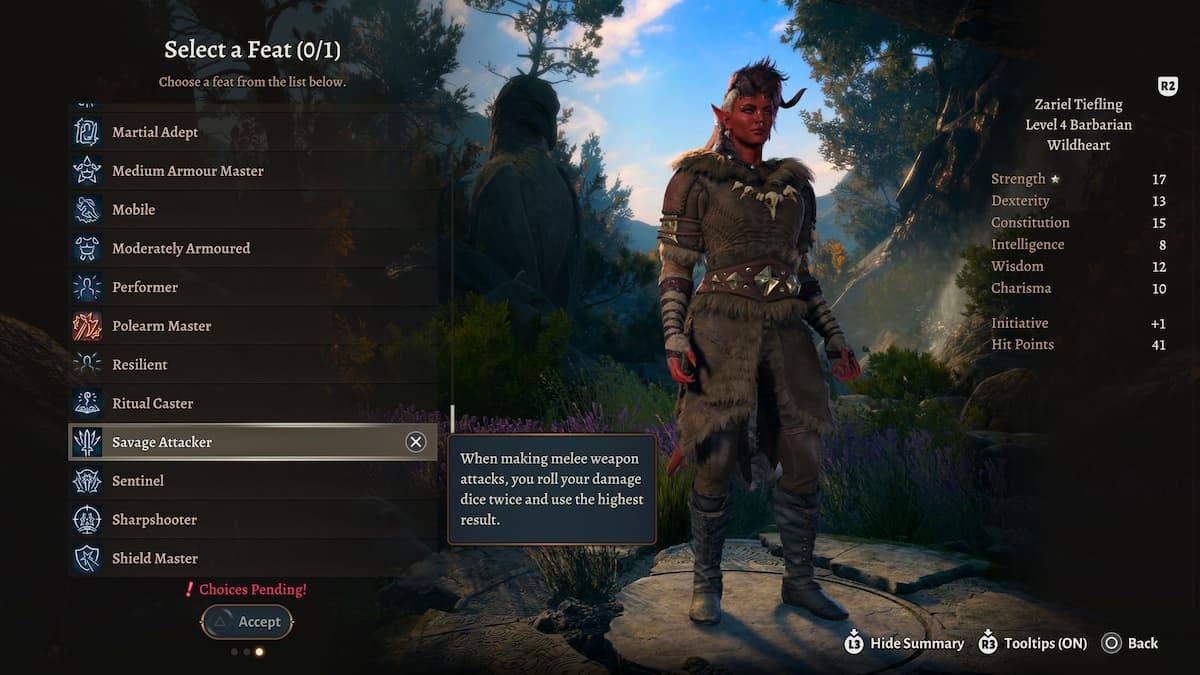
| How to Unlock | Description |
|---|---|
| Available at Level 4 | Roll damage dice twice, use highest result for melee weapon attacks. |
Savage Attacker maximizes damage output. Rolling damage dice twice and taking the higher result significantly increases the Barbarian's damage potential.
5. Charger
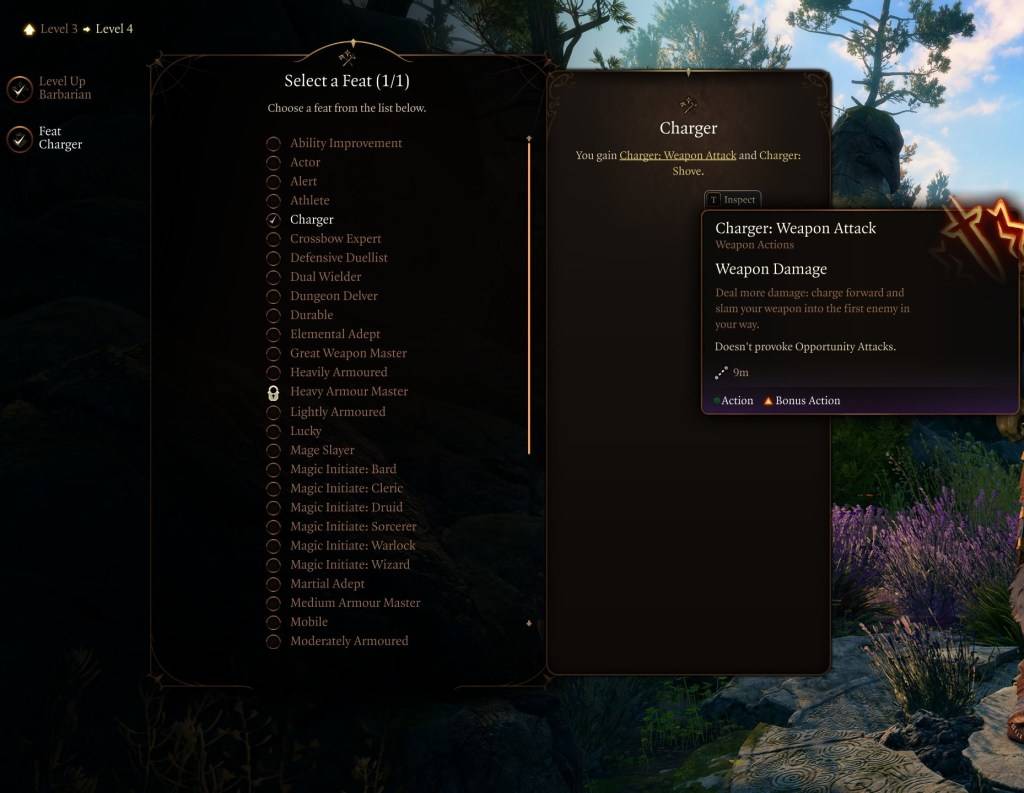
| How to Unlock | Description |
|---|---|
| Available at Level 4 | Increased damage when charging. No opportunity attacks provoked. |
Charger is thematically fitting and strategically sound. The 9m charge and immunity to opportunity attacks facilitate aggressive melee combat.
4. Tough
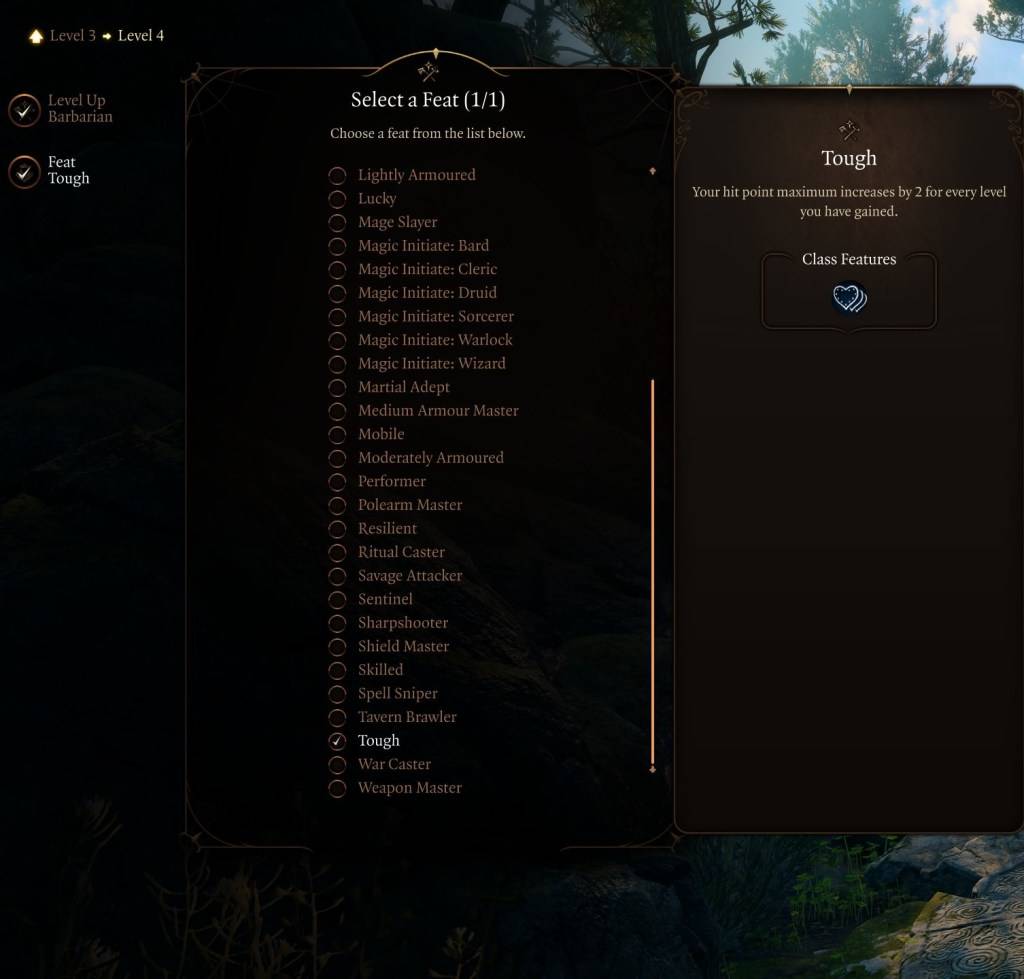
| How to Unlock | Description |
|---|---|
| Available at Level 4 | +2 HP per level gained (retroactive). |
Tough significantly boosts survivability. The additional hit points, applied retroactively, are a substantial defensive upgrade.
3. Sentinel
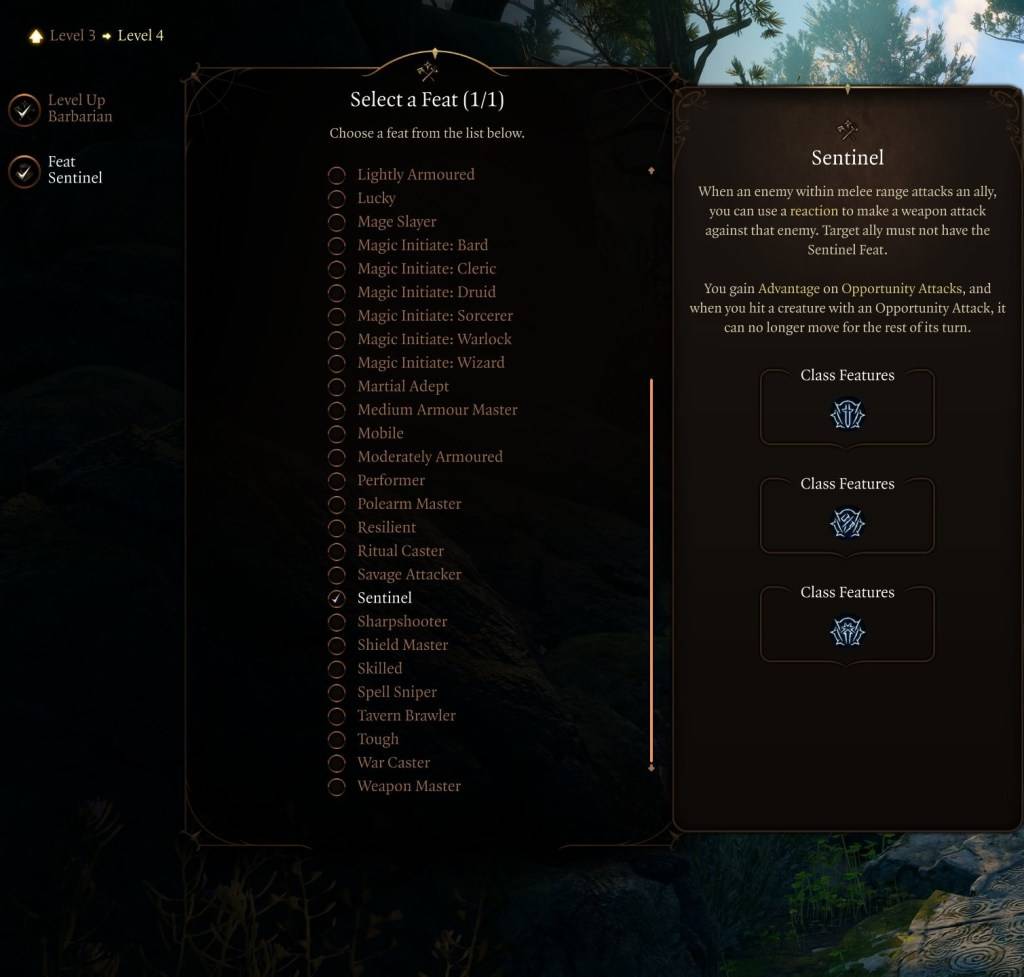
| How to Unlock | Description |
|---|---|
| Available at Level 4 | Reactionary weapon attack when an enemy attacks an ally. Advantage on opportunity attacks. Immobile target after successful opportunity attack. |
Sentinel transforms the Barbarian into a formidable protector. The ability to react to attacks on allies, gain advantage on opportunity attacks, and immobilize enemies makes this a top choice.
2. Polearm Master
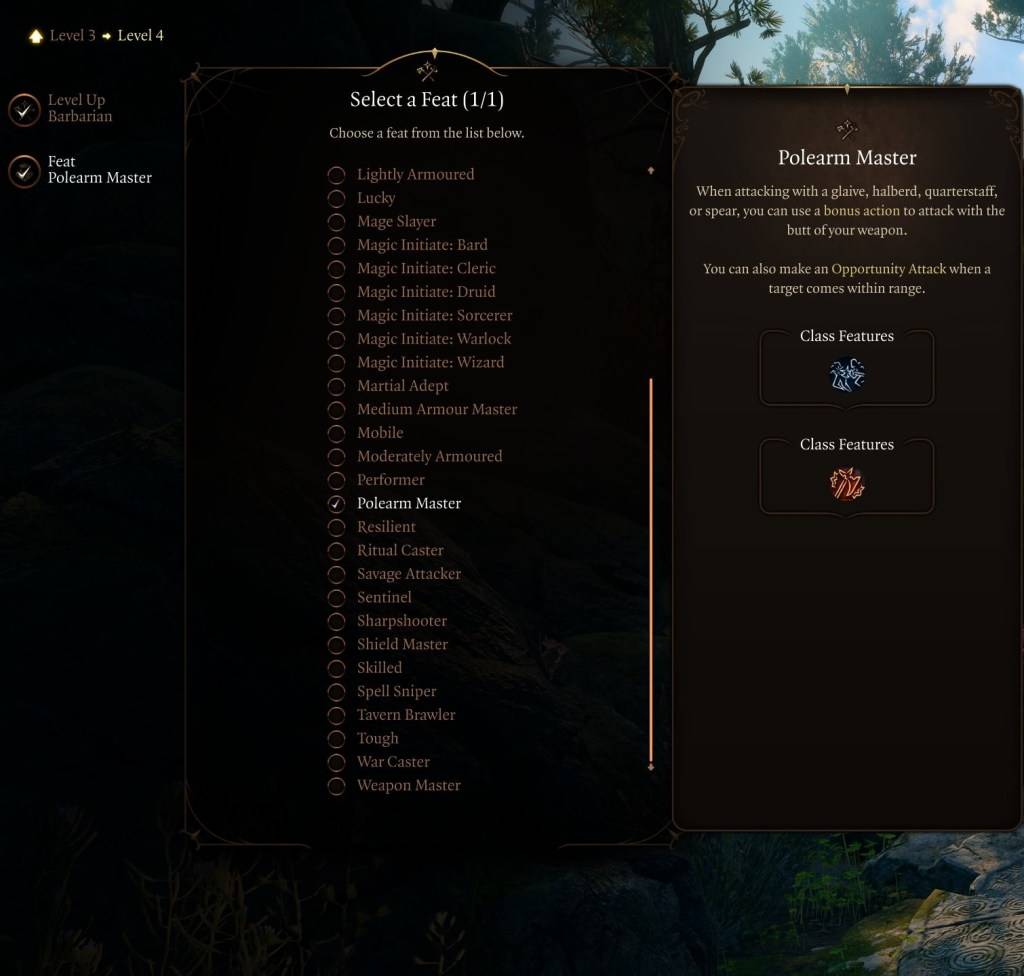
| How to Unlock | Description |
|---|---|
| Available at Level 4 | Bonus action attack with polearm butt. Opportunity attack when a target enters range. |
Polearm Master synergizes well with the Barbarian's melee focus. The extra bonus action attack and opportunity attacks significantly increase combat effectiveness.
1. Great Weapon Master
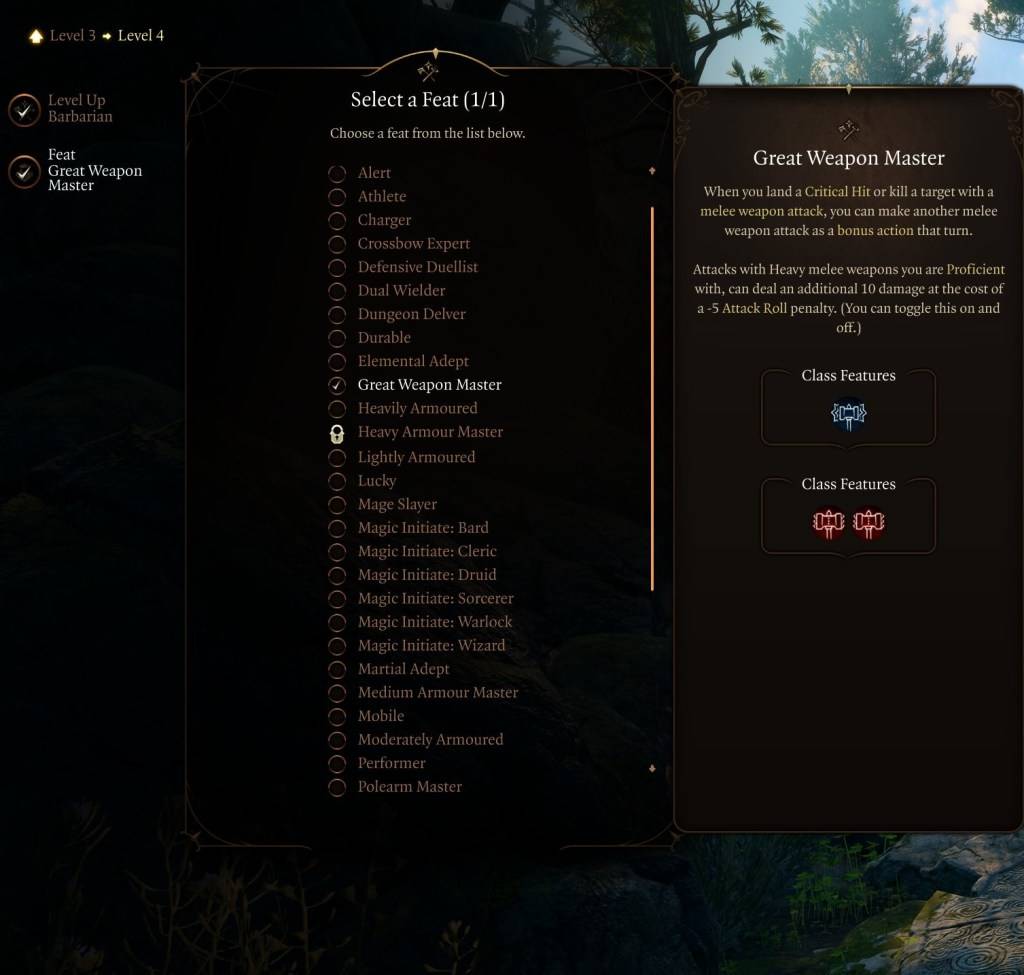
| How to Unlock | Description |
|---|---|
| Available at Level 4 | Bonus action attack after critical hit or kill. +10 damage, -5 attack roll penalty for heavy melee weapons. |
Great Weapon Master delivers immense damage. The high-risk, high-reward nature fits the Barbarian's aggressive playstyle. The bonus action attack and damage boost are powerful, despite the attack penalty.
These feats offer diverse benefits, enhancing both offensive and defensive capabilities. Great Weapon Master is a strong starting point for maximizing early-game damage, but the optimal selection depends on your preferred playstyle and build. Consider your strategy and choose accordingly.
(Updated 03/23/24 by Jason Coles; 1/27/25 by Liam Nolan)