Quick Links
The Sega Master System, an iconic 8-bit console that rivaled the NES, delighted gamers with its unique titles and exceptional ports. From the adrenaline-pumping action of Golden Axe and Double Dragon to the beloved Streets of Rage, the console also showcased its prowess with games like Mortal Kombat and Asterix & Obelix, which rivaled the performance of 16-bit Megadrive/Genesis titles.
For retro gaming enthusiasts, playing Sega Master System games on modern systems can be challenging, but the Steam Deck, paired with the robust EmuDeck software, makes this experience not only possible but enjoyable. Here's a comprehensive guide on how to set up emulators for Sega Master System games on your Steam Deck.
Updated January 15, 2024, by Michael Llewellyn: While the Steam Deck is powerful enough to handle Sega Master System games, achieving optimal performance can be tricky. That's where the Decky Loader and Power Tools plugin come in. Recommended by EmuDeck developers, these tools are crucial for enhancing your retro gaming experience. This guide has been updated to detail the installation process and the steps needed to restore functionality after a Steam Deck update.
Before Installing EmuDeck
 Before diving into the world of Sega Master System emulation on your Steam Deck, ensure you have the necessary tools and settings in place for a smooth installation:
- Keep your Steam Deck plugged in or fully charged.
- Use a high-speed micro SD card, formatted on the Steam Deck, for storage.
- Alternatively, an external HDD can be used, though this compromises the device's portability.
- For ease of use, connect a keyboard and mouse to mimic a home computer setup during file transfers and installations.
- If you don't have these peripherals, you can access the on-screen keyboard by pressing the Steam and X buttons together and use the trackpads as a mouse.
Activate Developer Mode
To ensure that your emulators run smoothly, you'll need to activate Developer Mode:
- Press the Steam button to access the left side panel.
- Navigate to System > System Settings.
- Enable Developer Mode.
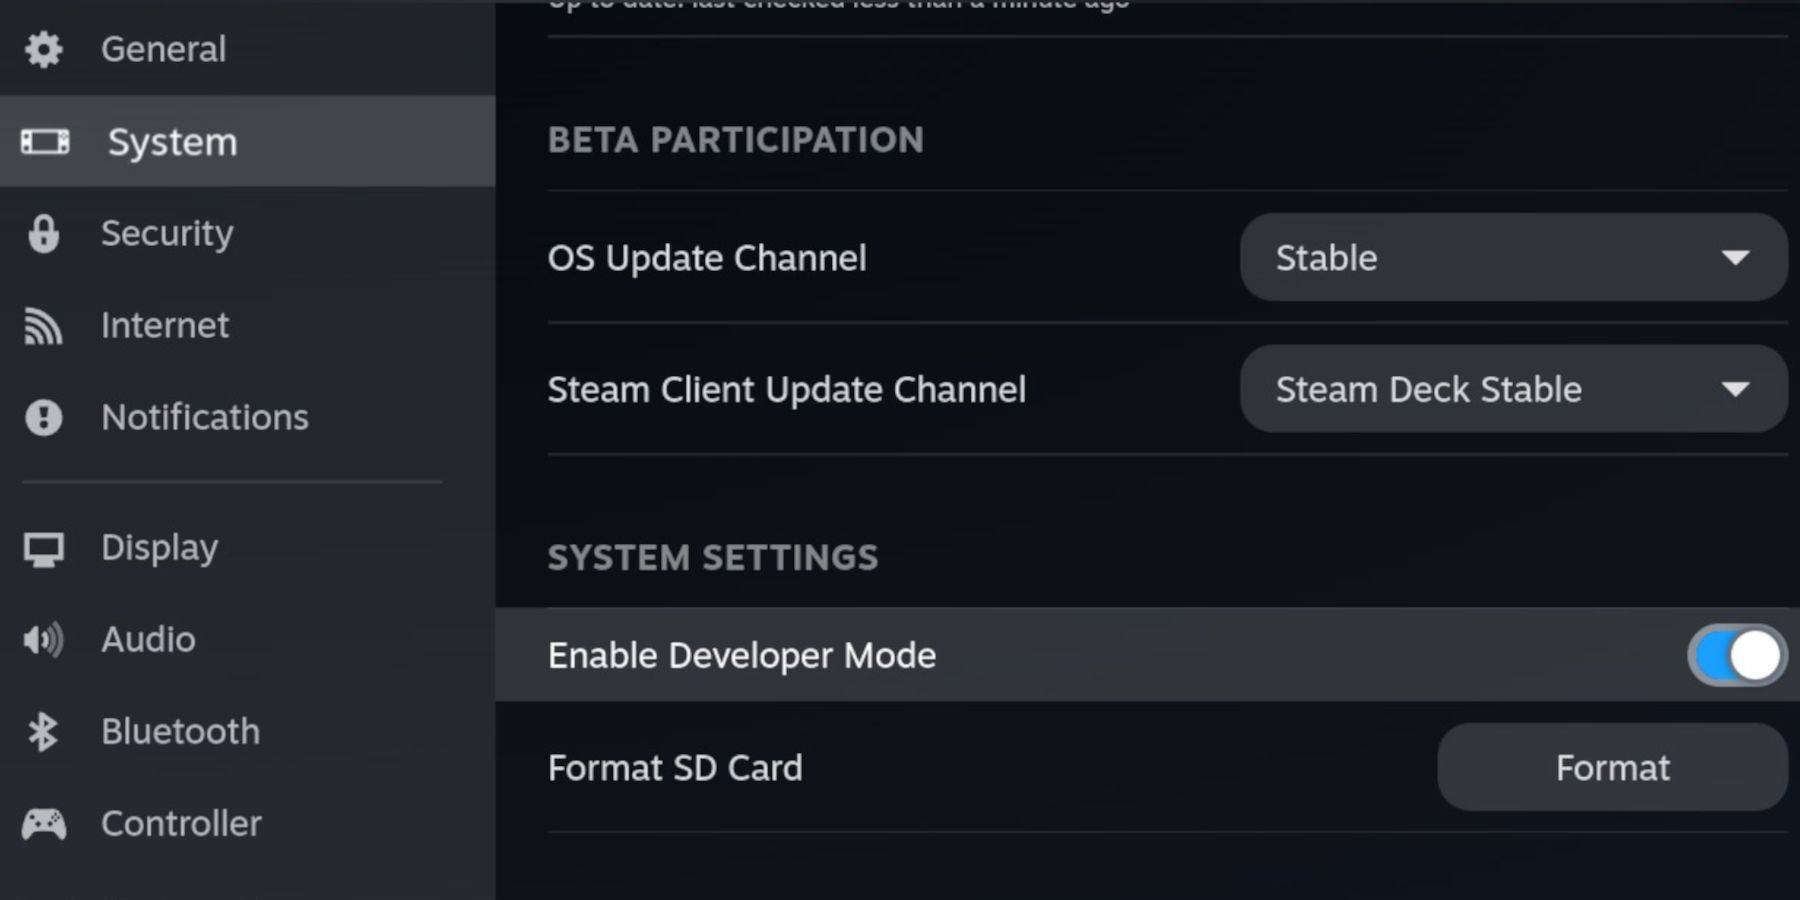 - Find the Developer menu at the bottom of the side panel.
- Open the Developer menu and turn on CEF Remote Debugging.
- Press the Steam button again, then select Power > Restart to reboot your Steam Deck.
Remember, CEF Remote Debugging can get disabled after a system update, which might affect plugins and emulators. Always check the Developer Menu post-update to ensure it remains enabled.
Installing EmuDeck In Desktop Mode
 - To switch to Desktop Mode, press the Steam button, then select Power > Switch to Desktop.
- Use a browser like Chrome or Firefox to download EmuDeck.
- Choose your SteamOS version and start the download. Once downloaded, double-click the installer and opt for the recommended installation.
- Select Custom Install.
- After installation, open the menu and choose the SD card labeled as Primary. This renames your SD card for easier access under Removable Devices in the Dolphin file manager.
- You can install all emulators or focus solely on the Sega Master System, selecting RetroArch.
RetroArch is a versatile application that can run emulators for various classic gaming systems, accessible under the 'Emulators' tab in the Steam library.
- Ensure Steam Rom Manager is also selected alongside RetroArch to integrate games into your Steam library.
- If you're looking for that nostalgic TV feel, activate the 'Configure CRT Shader for Classic 3D Games' feature.
- Click Finish to complete the installation.
Transferring Master System Roms
With RetroArch and EmuDeck set up, it's time to add your Sega Master System ROMs:
- Open the Dolphin File Manager.
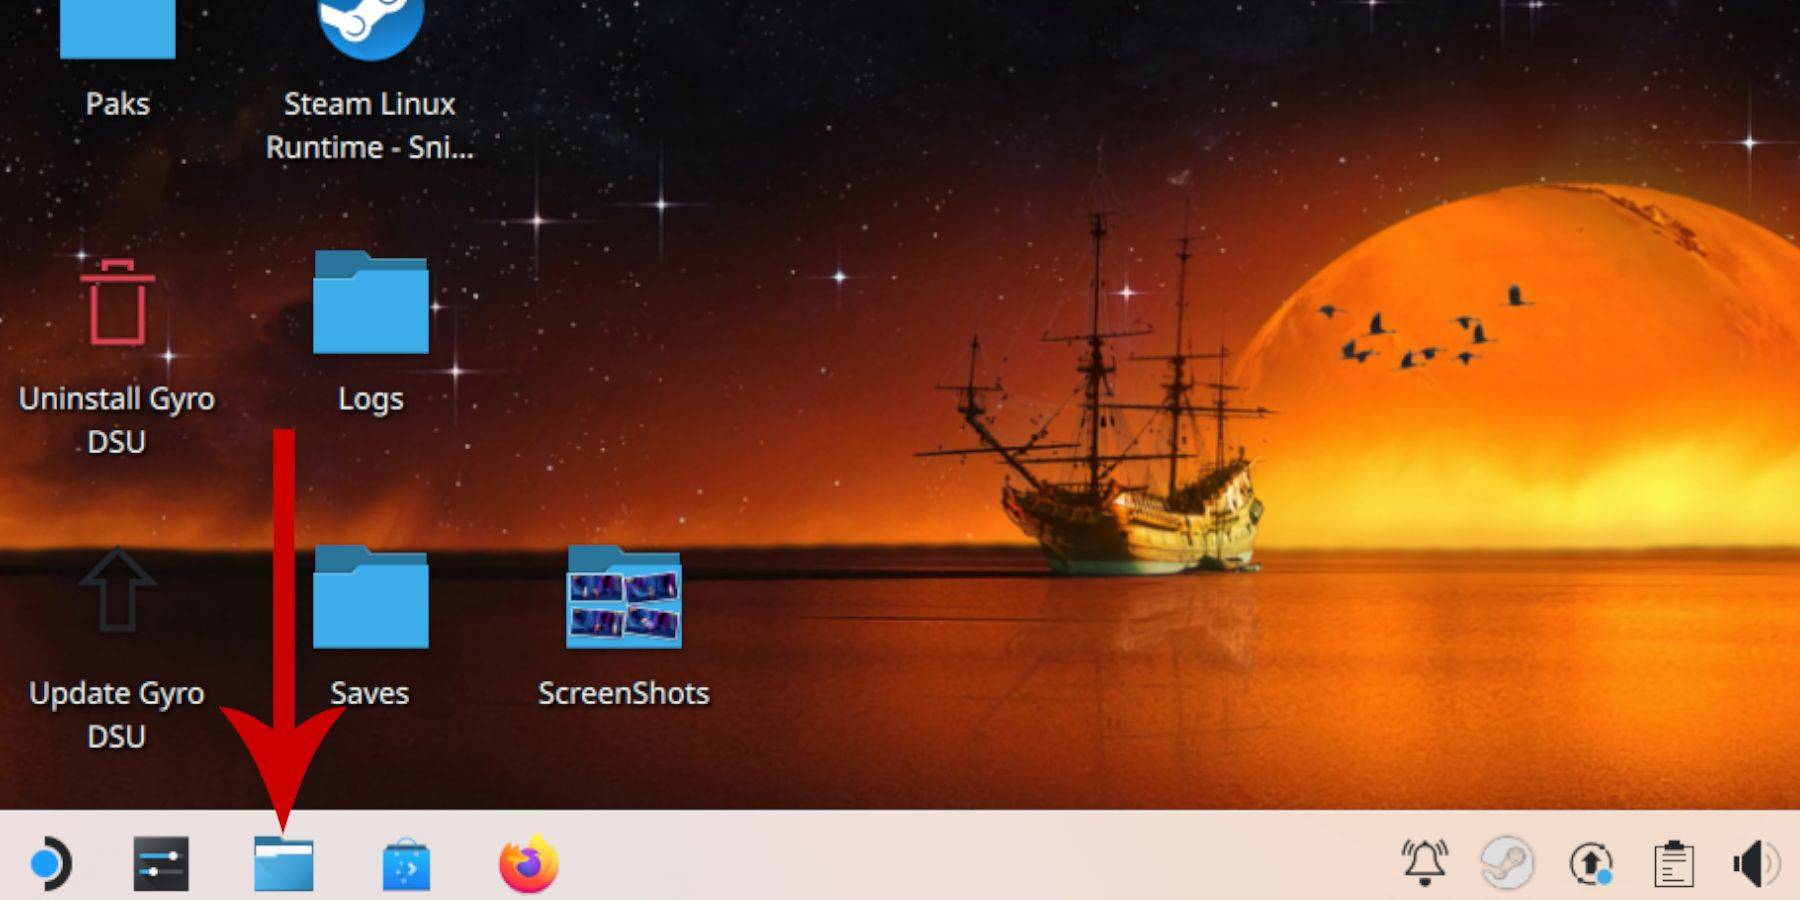 - In the left panel, find Removable Devices and open the SD card labeled Primary.
- Navigate to the Emulation folder, then to ROMS.
- Locate the 'mastersystem' folder.
- Transfer or copy your Sega Master System ROM files (.sms extension, e.g., 'Pro Wrestling.sms') into this folder, ignoring the 'media' file.
Adding Master System Games To The Steam Library
 To enjoy your Sega Master System games in Gaming Mode, add them to your Steam Library:
- Launch EmuDeck in Desktop Mode.
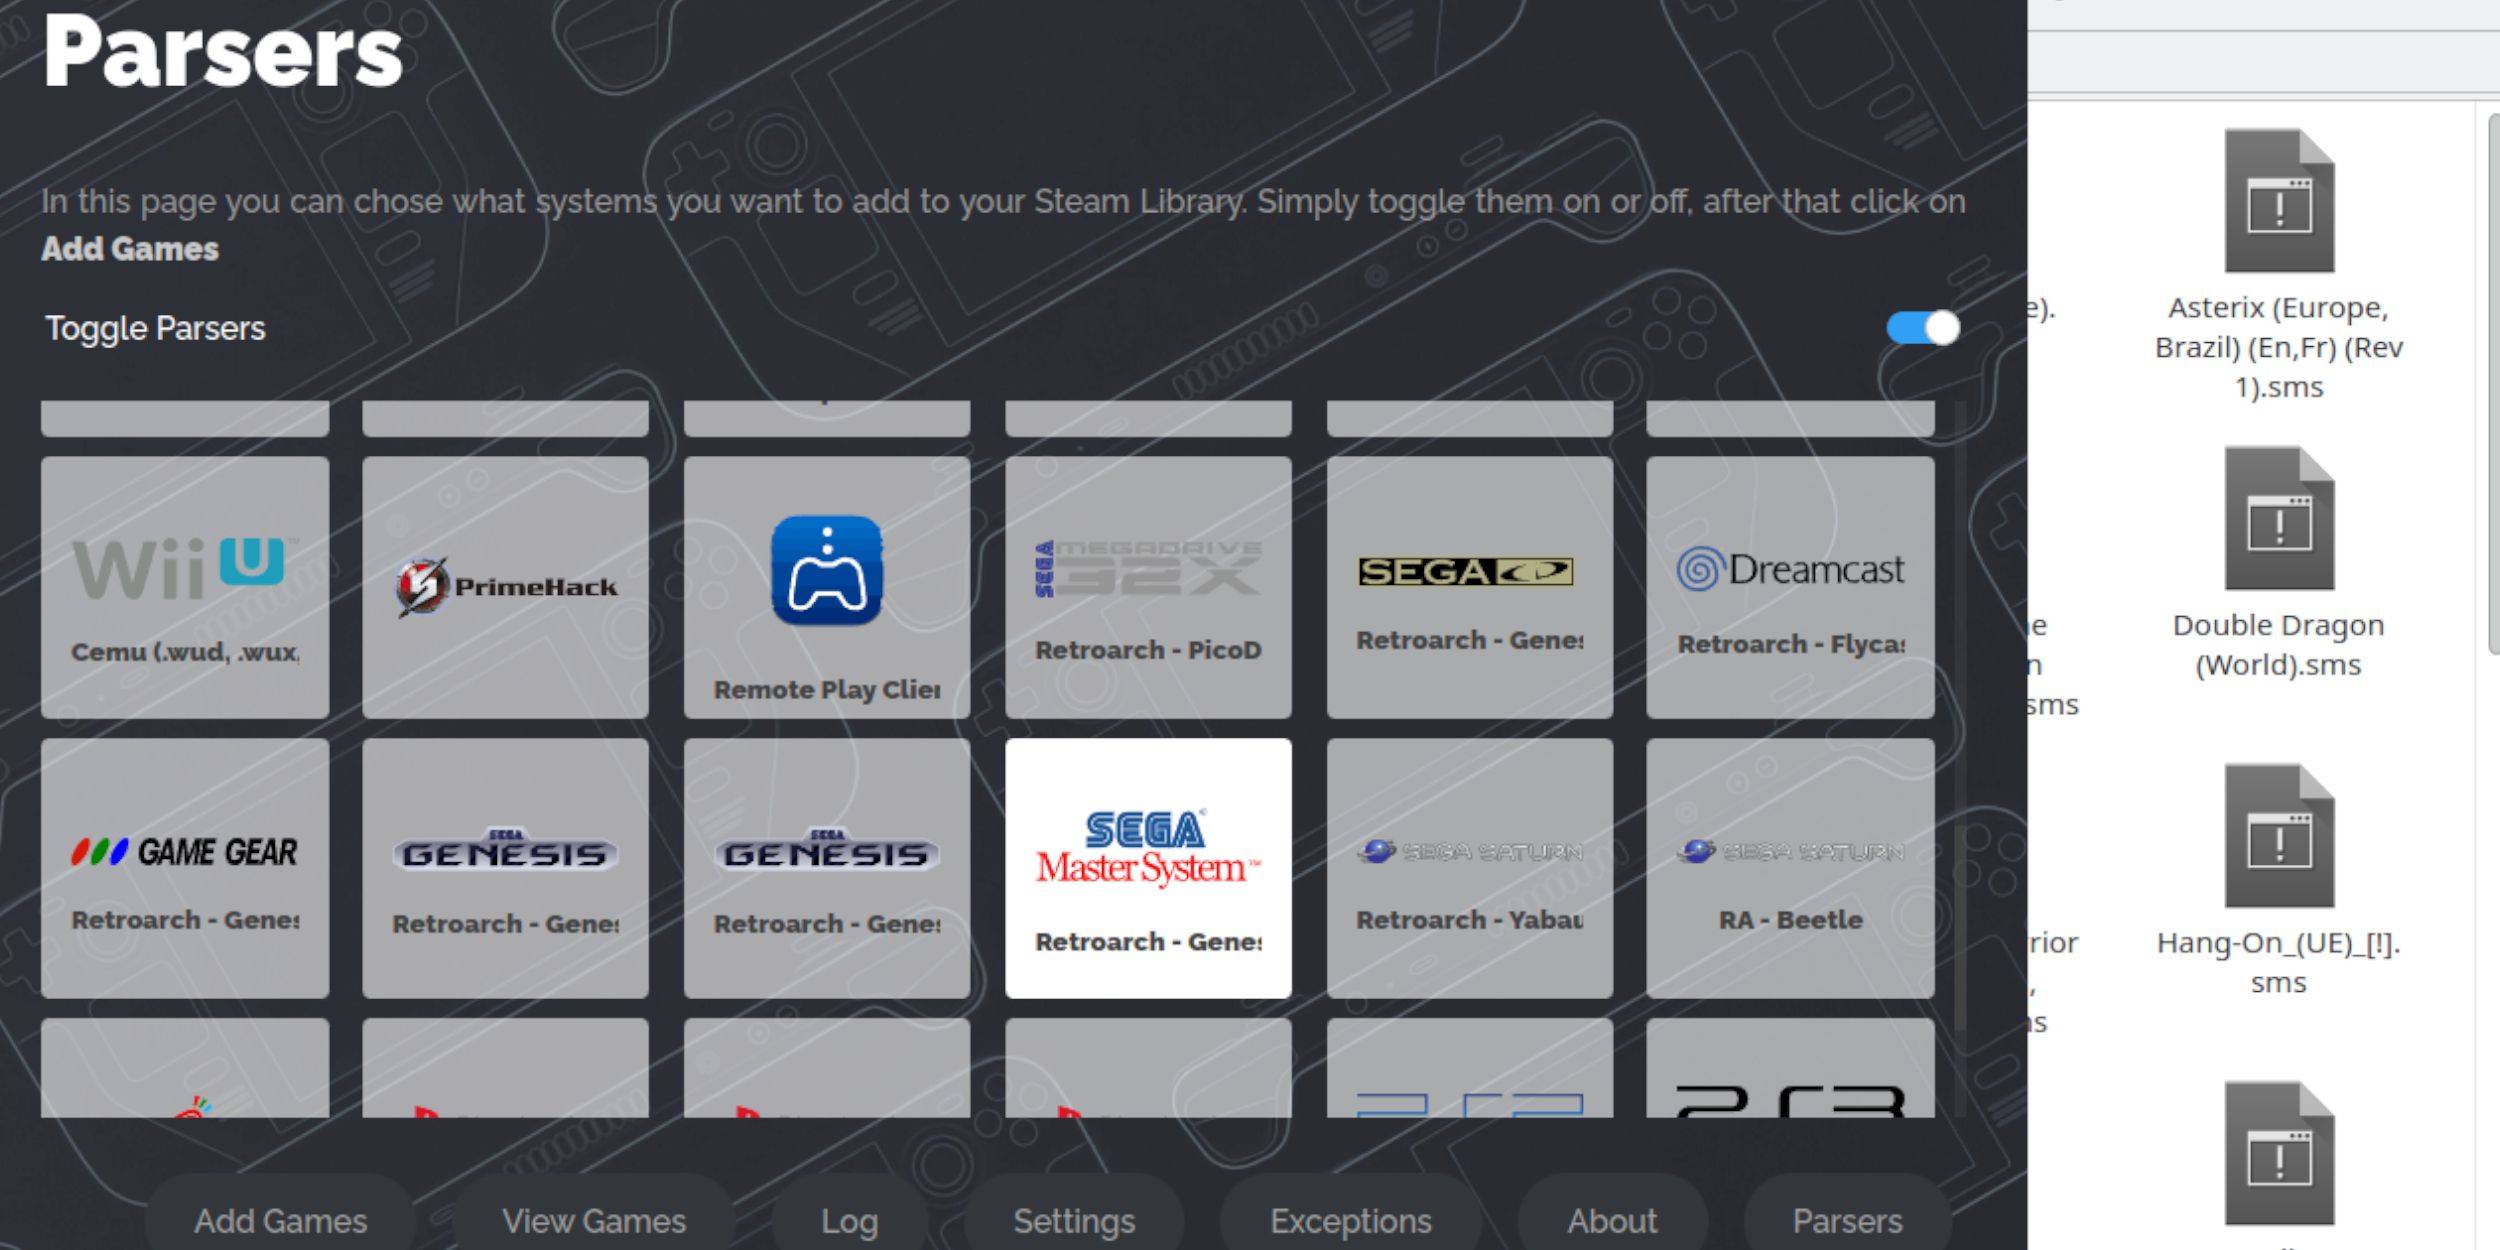
- Open the Steam Rom Manager and click Next on the welcome page.
- Disable all Parsers except for Sega Master System.
- Click Add Games, then Parse.
- Ensure the games and their cover art are displayed, then select Save to Steam.
Fix Or Upload Missing Artwork
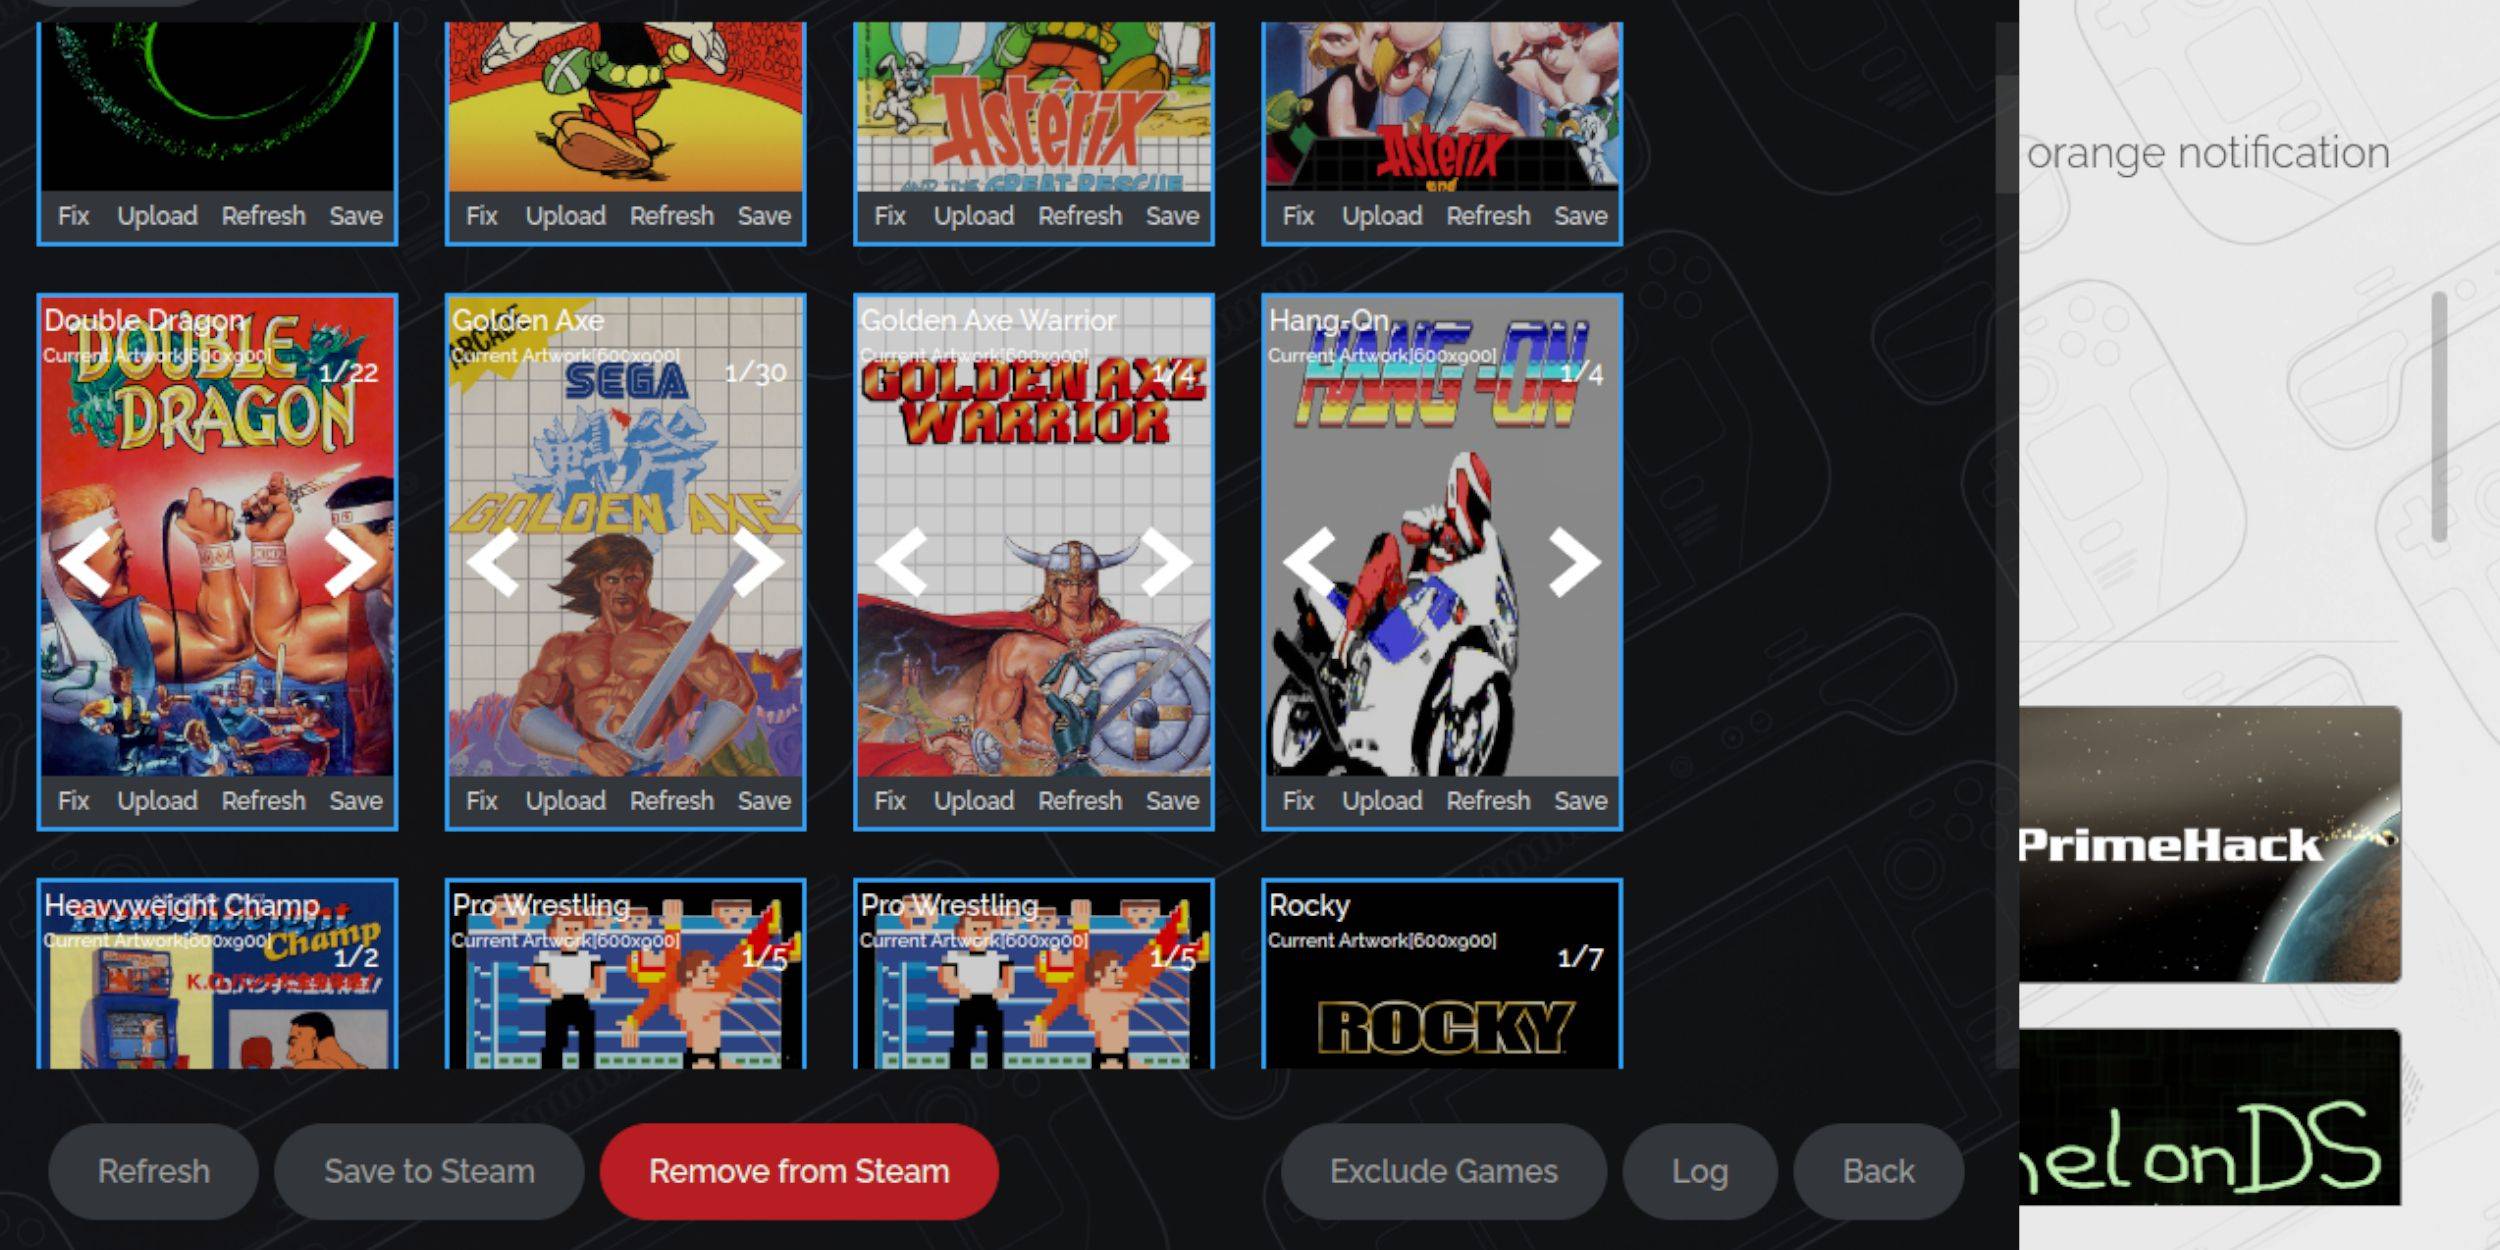 For a retro console like the Sega Master System, you might encounter missing or incorrect artwork. Here's how to fix it:
- Click Fix on the cover frame.
- Usually, Steam Rom Manager will display cover art automatically. If not, enter the game's title in the Search for game field.
- Browse the available covers, select the best one, then choose Save and close.
Upload Missing Artwork
If the Steam Rom Manager can't find suitable artwork, you can upload it manually:
- Use a browser to find the correct artwork and save it to the Steam Deck's Pictures folder.
- Click Upload on the cover frame.
- Select the new artwork from the Pictures folder, then save and close.
- If the image doesn't display, use the left and right arrows to locate it.
- Click Save to Steam.
- Once the batch files are processed, switch back to Gaming Mode.
Playing Master System Games On The Steam Deck
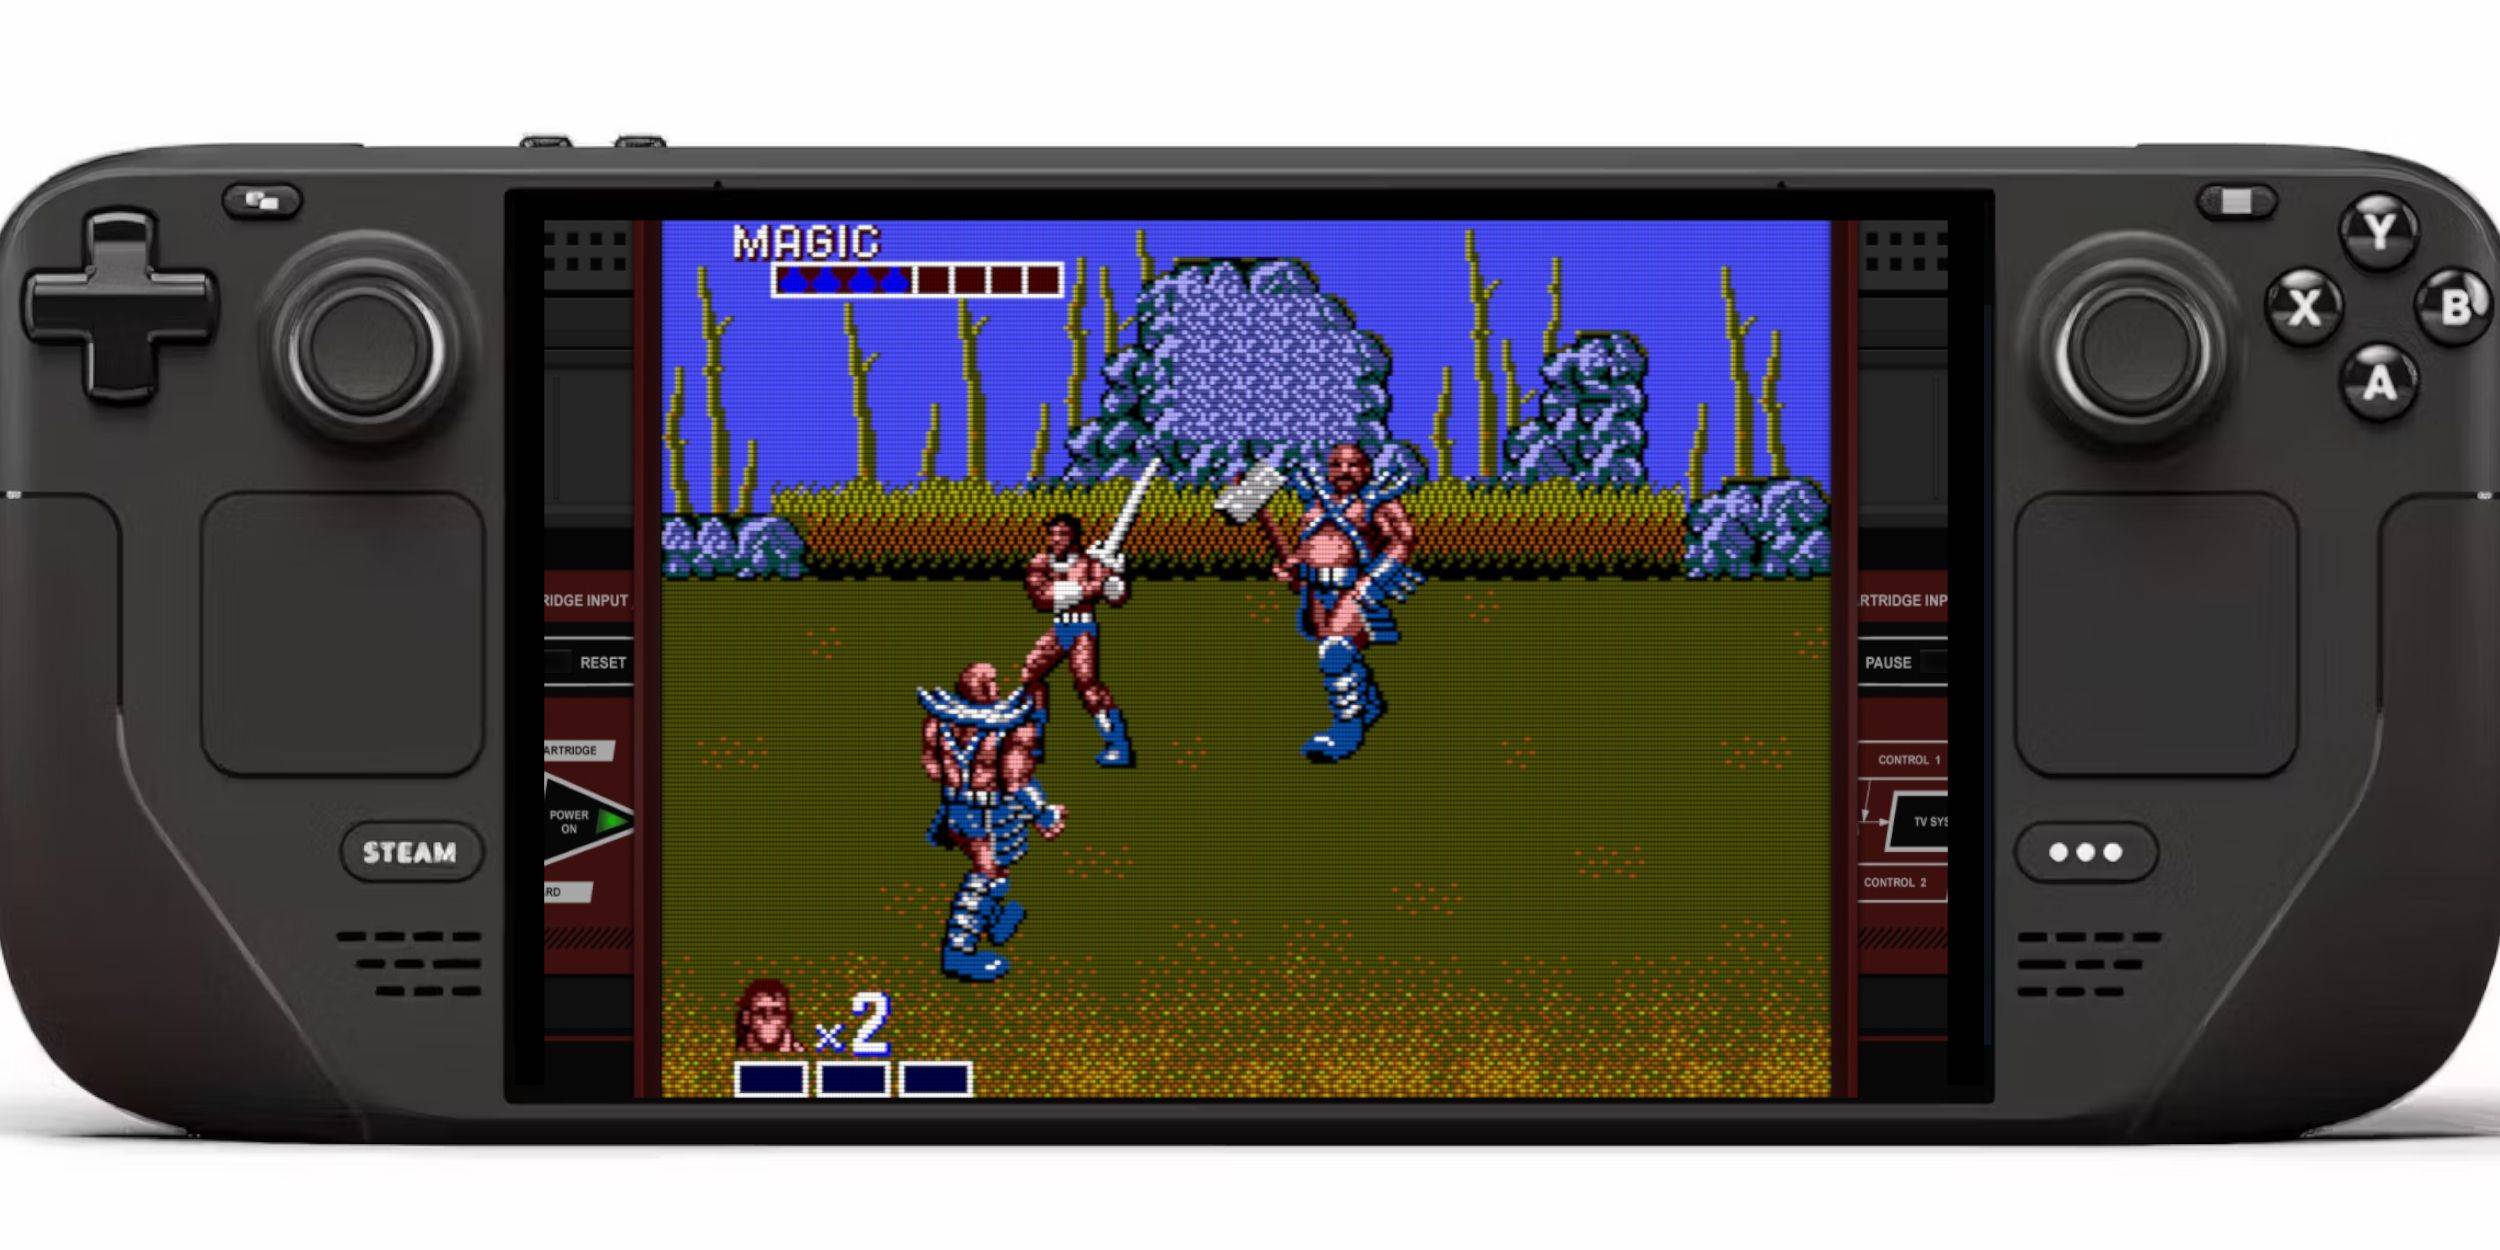 With the cover art uploaded, you can now play your emulated Sega Master System games in Gaming Mode:
- In Gaming Mode, press the Steam button.
- Navigate to Library from the side menu.
- Press R1 to access the Collections tabs.
- Click on the Sega Master System collection.
- Select your desired game and start playing.
Improve Performance
To optimize the performance of your classic games on the Steam Deck:
- Open a Sega Master System game and press the QAM button below the right trackpad.
- Access the Performance menu.
- Enable 'Use game profile'.
- Set the Frame Limit to 60 FPS.
- Turn on Half Rate Shading.
Install Decky Loader For The Steam Deck
 To enhance your Steam Deck's performance for emulated games, the EmuDeck developers recommend installing Decky Loader and the Power Tools plugin:
- Connect a keyboard and mouse for easier navigation, or use the trackpads and on-screen keyboard (Steam + X).
- In Gaming Mode, press the Steam button, then Power > Switch to Desktop.
- Open a web browser (downloadable from the Discovery Store).
- Navigate to the GitHub Decky Loader page and click the Download icon.
- Once downloaded, double-click the launcher and select Recommended Install.
- Restart your Steam Deck in Gaming Mode after installation.
Install Power Tools
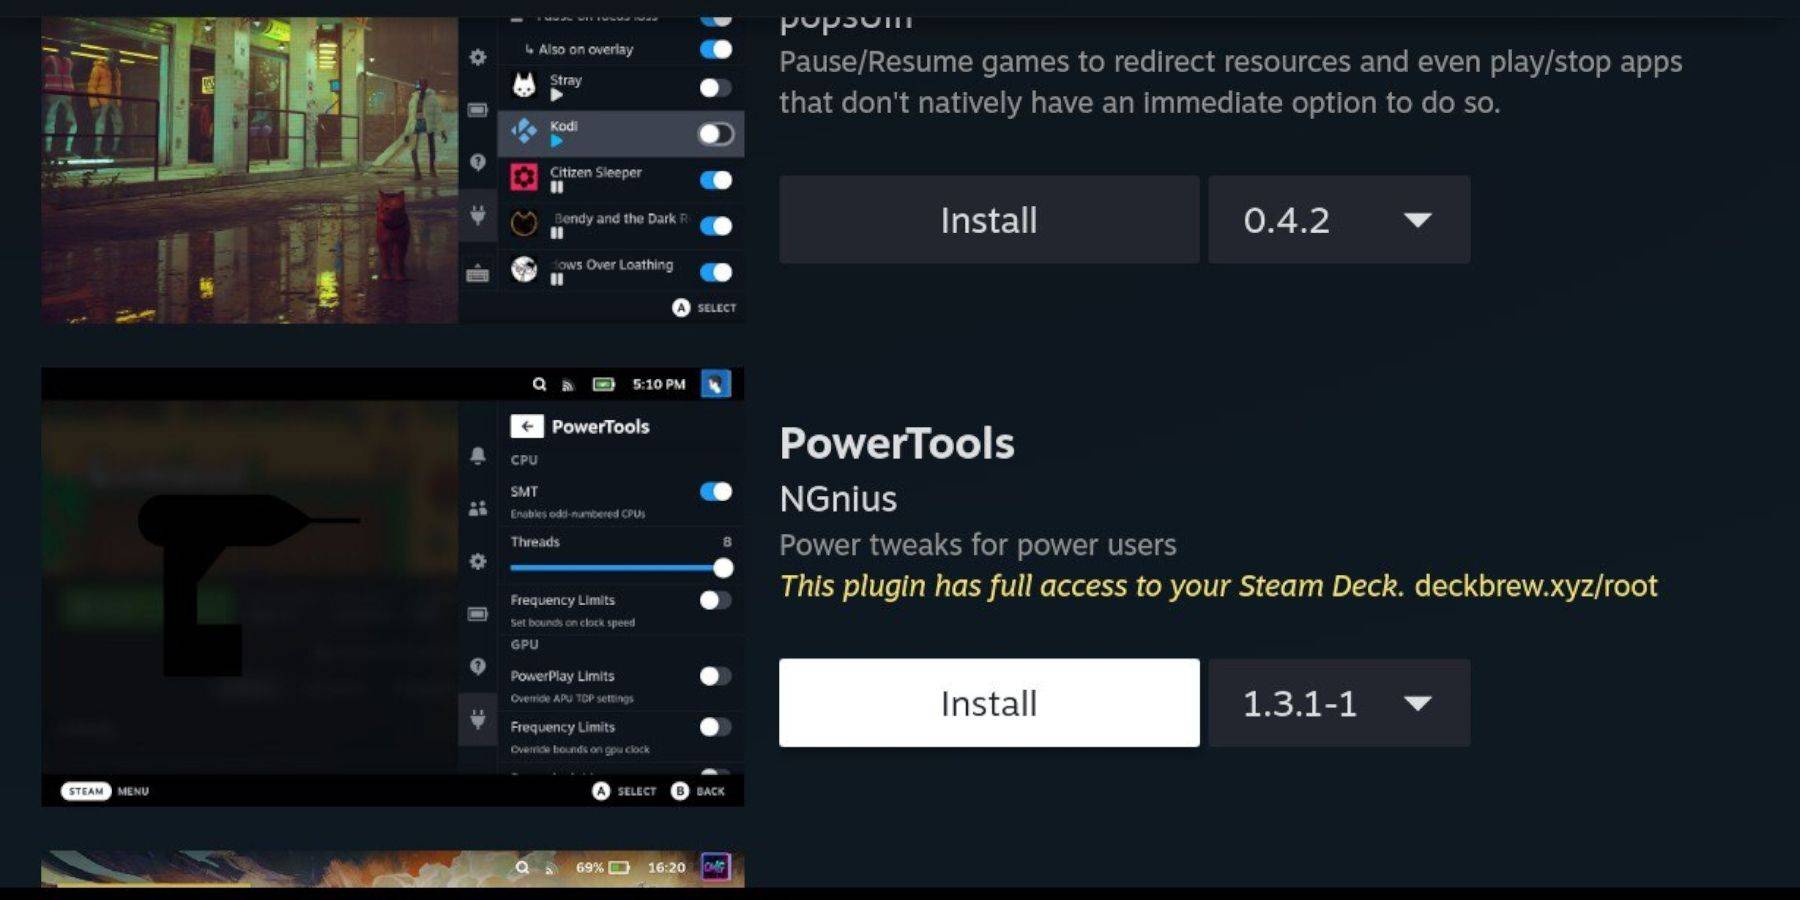 With Decky Loader installed, add the Power Tools plugin:
- In Gaming Mode, press the QAM button.
- Select the new plugin icon at the bottom of the QAM menu.
- Click the store icon at the top of the Decky Loader menu.
- Find and install the Power Tools plugin from the Decky Store.
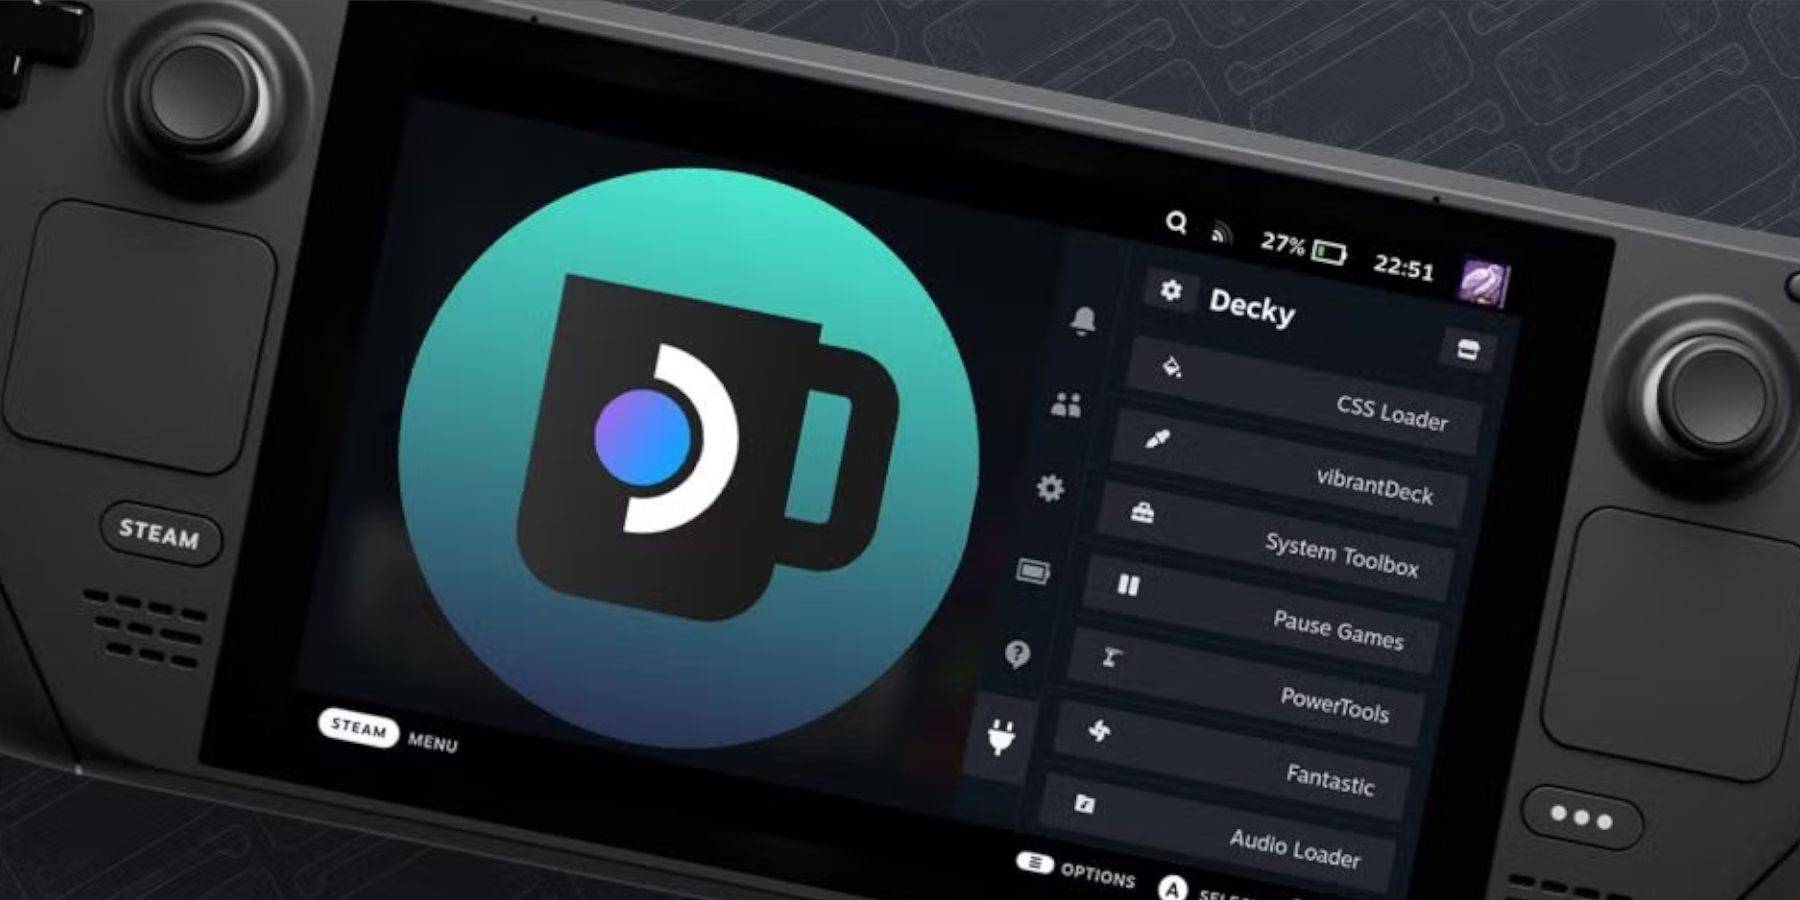
Power Tools Settings For Emulated Games
To optimize your emulated games using Power Tools:
- From the Steam button, open your Library and launch a Master System game.
- Press the QAM button, navigate to Decky Loader, and select Power Tools.
- Disable SMTs.
- Set the number of Threads to 4.
- In the Performance menu (accessible via the QAM button and the battery icon), enable Advanced View.
- Turn on Manual GPU Clock Control.
- Set the GPU Clock Frequency to 1200.
- Select Per Game Profile to save these settings for each game.
Fixing Decky Loader After A Steam Deck Update
 Steam Deck updates can disrupt third-party apps like Decky Loader. Here's how to restore it:
- In Gaming Mode, press the Steam button, then Power > Switch to Desktop.
- Once in Desktop Mode, open a browser.
- Visit the Decky Loader GitHub page and click the Download icon.
- This time, select Execute.
- Enter your pseudo password when prompted. If you haven't set one, follow the on-screen instructions to create one.
- After installation, turn off and restart your Steam Deck in Gaming Mode.
- Press the QAM button to confirm that Decky Loader and its plugins are restored.
 Rate NowYour comment has not been saved