Securing your shelter in the zombie-infested world of Project Zomboid requires more than just finding a place to hide. This guide details how to create a crucial defensive measure: barricading windows.
Creating Basic Window Barricades in Project Zomboid
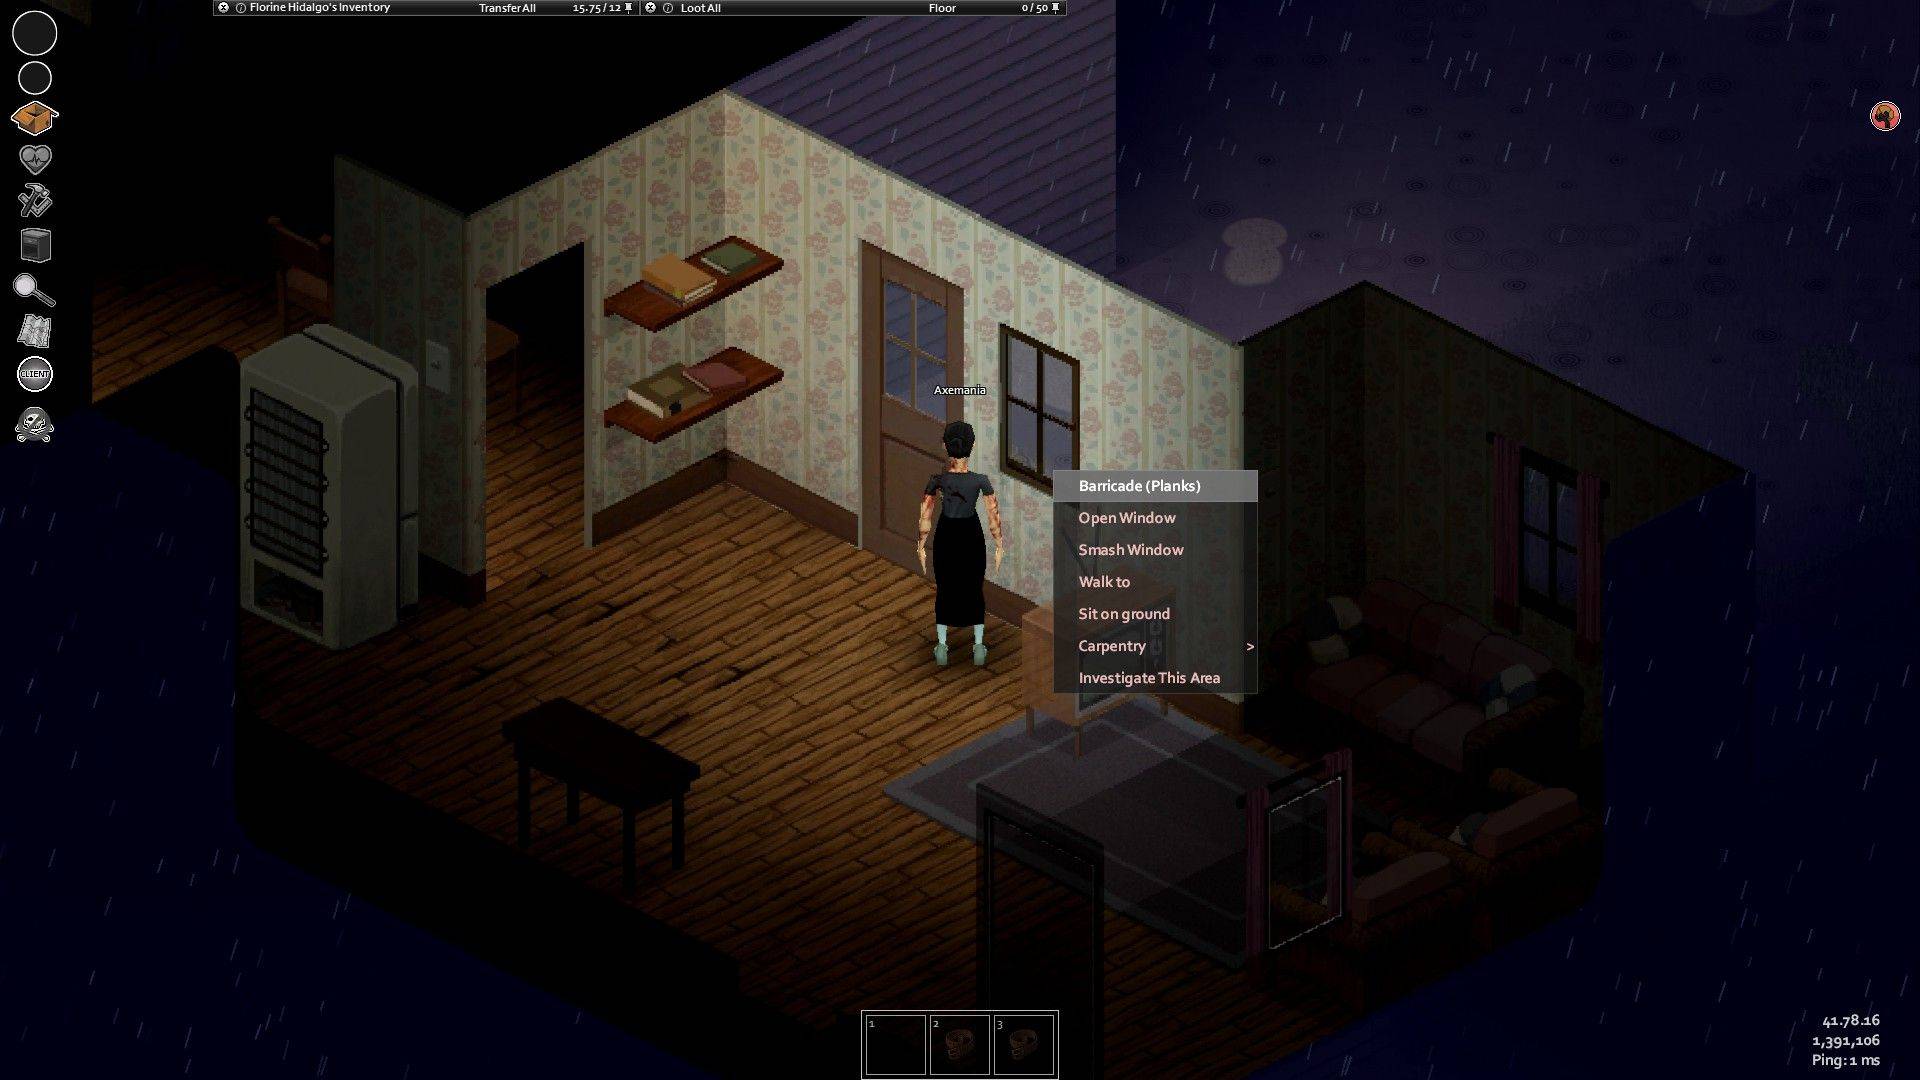
To effectively board up a window, you'll need a wooden plank, a hammer, and four nails. Once you've gathered these essential supplies, right-click the target window. Your character will automatically begin securing the plank. Each window can accommodate up to four planks for increased protection.
Finding the necessary materials is key. Hammers and nails are typically found in toolboxes, garages, sheds, closets – anywhere you'd expect to find such items in a real-life scenario. Wooden planks are commonly located at construction sites, or you can salvage them by breaking down wooden furniture like shelves or chairs. For those using admin commands, "/additem" can be utilized to spawn the needed items.
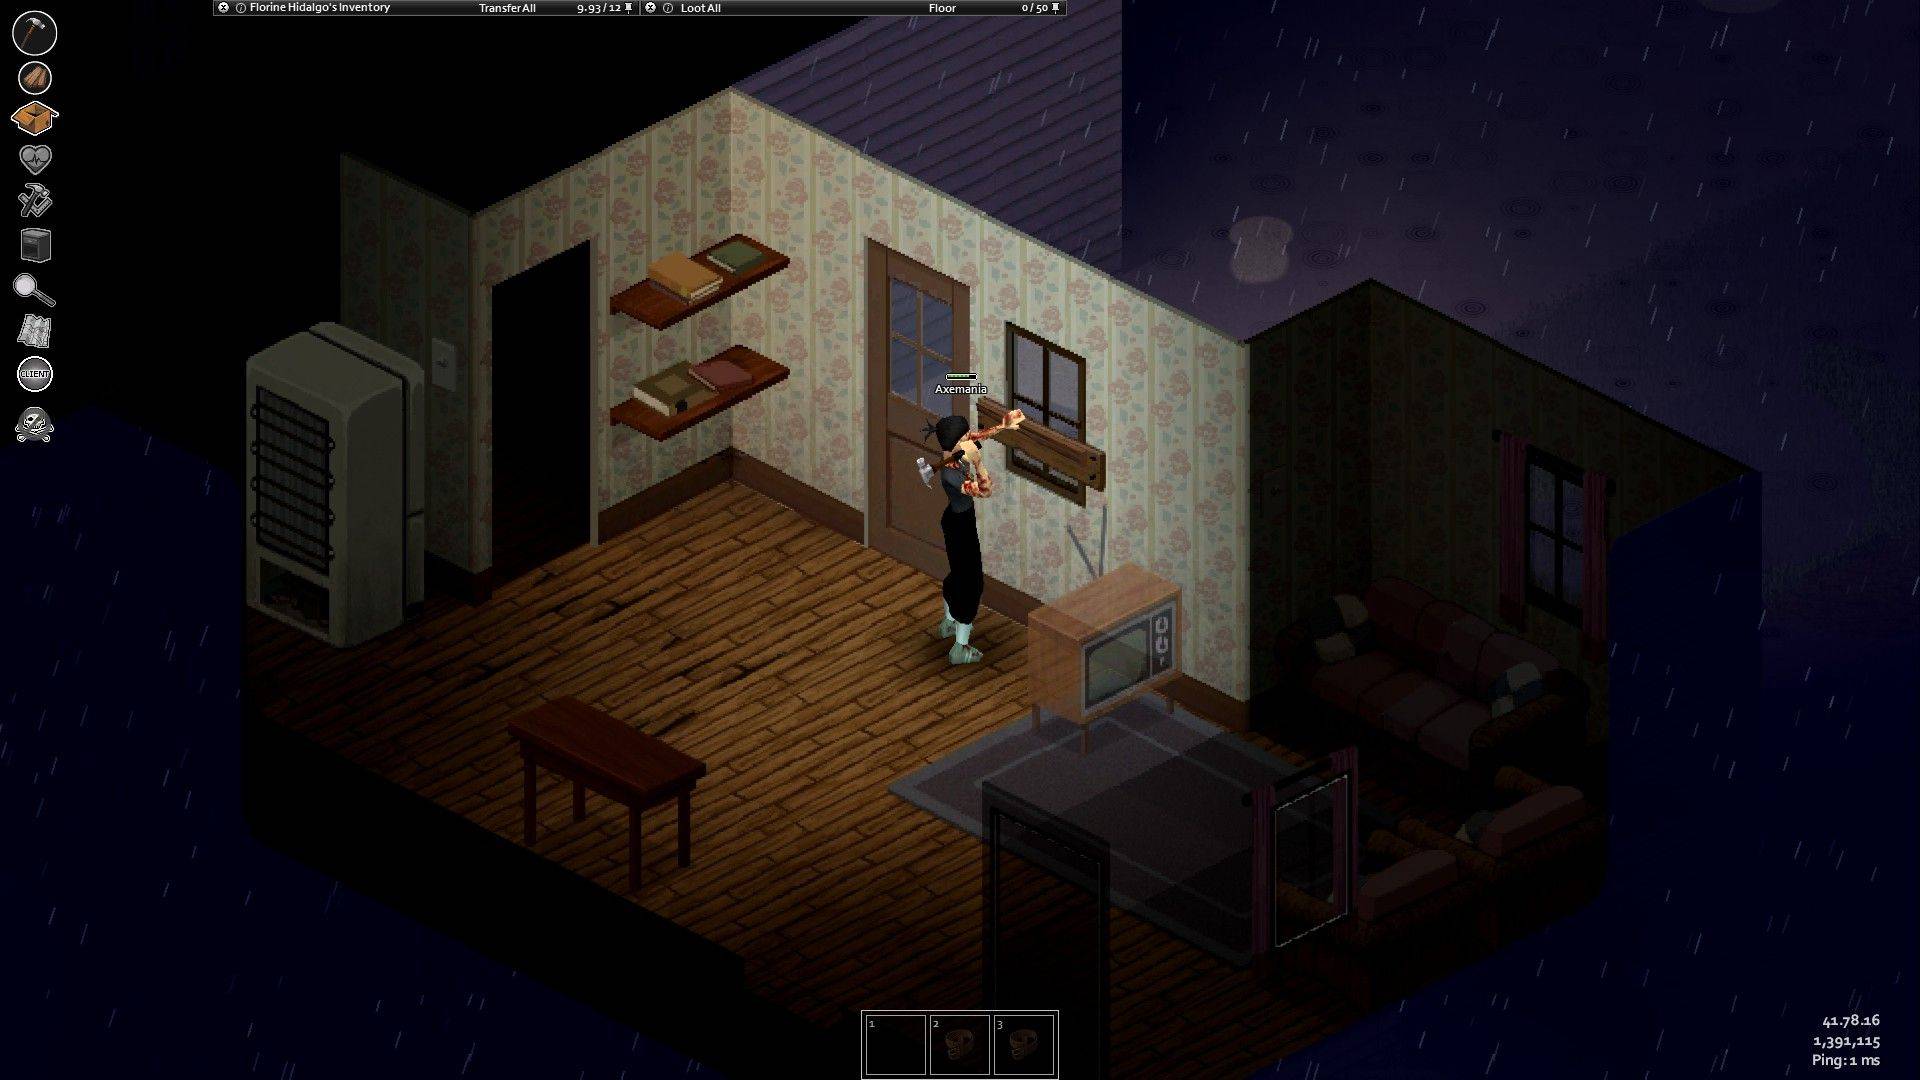
Barricaded windows significantly hinder zombie access compared to unprotected windows. The more planks you add, the more time it takes zombies to breach the barrier. To remove planks, right-click the boards and choose the "Remove" option. Note that you'll require a claw hammer or crowbar to do this.
Larger furniture items, like bookshelves or refrigerators, are ineffective as window barricades in Project Zomboid. Characters and zombies will pass right through them. While these are useless for defense, knowing how to move furniture remains a valuable skill for interior arrangement.
For superior barricades, metal bars or sheets can be used, but this requires a sufficient Metalworking skill level.